Q2 Plans Chapter 9 Page 9-04


- Details
- Category: Q-2/Q-200 Plans
- Published: Monday, 22 May 2006 09:05
- Written by Quickie Aircraft Corporation
- Hits: 4733
|
..... The first UNI ply is put on at 45 degrees to the main wing T.E.. The fibers must be straight, so take your time getting the wrinkles and kinks out. Don't get ahead of yourself on pouring microfoam slurry on the foam; otherwise, by the time you are ready to place the UNI over a particular area, you will have a messy, hard lump of slurry. Work with one piece of cloth at a time, and with small batches of slurry and epoxy. Also, unrolling the UNI cloth as needed is advised to reduce the ackwardness of the large pieces. Scrap UNI can be used to fill in any small spots not covered by the large pieces of UNI. .....At the leading edge of the main wing cores, let the UNI cloth hang verti ca lly down. Trim to withi n 1" of the tangent point, just like you did on the ailerons. At the trailing edge, allow the cloth to drape around the corner and down to the bottom of the shear web so that the UNI is at 45 degrees to-the T.E. on that face also. Trim the main wing tip UNI to within t" of the main wing core. Inboard, along the trim line, also allow the UNI to drape over the edge and down to the bottom. .....No overlap is required on the UNI wing skin; just butt fit the skins together.' You must, however, squeegee the cloth well to avoid building up excess epoxy in the lamination. .....The second ply of UNI is also placed at 45 degrees to the T.E. of the"main wing cores but in the other direction from the first ply, so that the two plies of UNI will have their major fiber orientations at 90 degrees to each other. The second ply will be easier because it is being layed up over glass and not the foam. Try to avoid having the butt joints from the first ply of UNI coincide with the butt joints from the second ply of UNI. The second ply of UNI is also draped around the corner and down to the bottom of the shear web, so that the shear web has two plies of UNI at 45 degrees to the T.E. and at 90 degrees to each other. Trim all edges like you did on the first ply. .....Spar Caps A thru F are laminated in that order, with the widest cap going on first. To pick up a spar cap and place it on the main wing, use three people. While one person holds each end of the spar cap, the third removes any frazzles, being careful not to re¬duce the width below what is called out for the particular spar cap. That third person then stands at BL00 and positions the spar cap in the proper location (centerline on BL00 and proper distance from the leading edge of the main wing) while the other two individuals keep the cloth off of the foam so that it won't stick. When the center (third) person is ready, one of the individuals holding an end lays it down spanwise on the main wing in the proper position (in relation to the main wing L.E.) and removes any wrinkles and kinks. This can be a slow process, so stay patient. rhen the man (or woman) on the other end does like¬wise. The center individual makes sure that the spar cap smoothly "turns the corner" at BL00. .....Squeegee each spar cap from BL00 outboard to keep the UNI fibers straight. Work out any wrinkles or kinks by pulling carefully on the fibers. .....The remaining spar caps are each put on in a similar fashion. We know you are getting tired, but you must squeegee each cap well to avoid building up considerable epoxy on the bottom plies. Use extra epoxy very sparingly on the last spar cap. .....Locate the places where you bonded in the two SH1's (the 1" x 1" mild steel plates) and laminate a pad of 20 plies of BID over each one. The BID cloth should be about 2" x 2" dimensionally. .....Before quitting, peel ply all joints, and the first two inches of the main wing L.E.. Also, knife trim the L.E. at the tangent point, just like you did on the aileron. Then, clean up your mess and go celebrate your wizardtry as a laminator. DON"T TOUCH THE MAIN WING FOR AT LEAST 24 HOURS.
LAMINATING THE TOP SKIN AND TOP SPAR CAPS
..... Build a framework out of scrap lumber and bon do to hold the main wing jigged in place while you turn it over. As shown in the pictures, we suggest that lumber run from tip to tip with a few cross pieces. Don't get fancy, just tie everything together so that the main wing won't move, (and, yes, we know the pictures show the canard, but we forgot to take some of the main wing jigging). 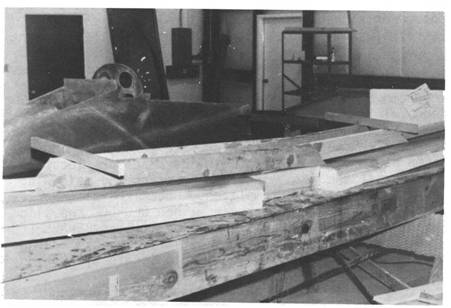 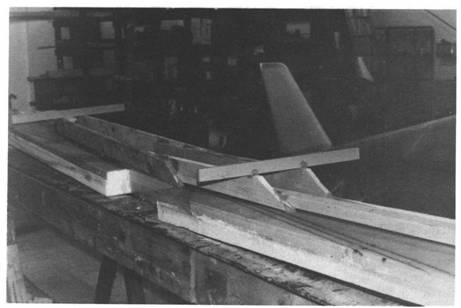 ..... Next, when you are sure of your framework, break loose the main wing core female jigging templates with a hammer ,( they won't be needed aga in), and turn the main wing over so that the unglassed cores are upward. Set the main wing on the jigging table once again. .....Check the main wing tip level lines. Jig, and shim, and bondo until the main wing tip level lines are perfect; almost doesn't count. Then bondo the heck out of the jigging as if you were expecting a few kids to use your shop for playing cowboys and Indians. .....At the leading edge, feather the bottom skin to a feather edge at the tangent point just like you did with the ailerons. Prepare the main wing core top surface just like you did the main wing core bottom surface. (See "Preparing The Main Wing Cores For Glassing") you are now ready to laminate the top main wing skins and top spar caps. Do it similarly to the bottom lamination. The skin is the same two UNI at 45 degrees to the T.E., draping over the T.E. down to the bottom of the shear web and the spar caps are G thru M this time. At the leading edge of the main wing, overlap the bottom skin with the top skin a minimum of 1". Rather than let the spar caps drape over the T.E. and down the shear web, trim the caps at the T .E. .....Peel ply the shear web and all joints. Don't touch the wing for 48 hours after you have finished it. Instead, go sit in the fuselage some more to pass the time, or else skip ahead and keep working. Before removing the lumber, bondo a level board at about midspan on each wing half. This is to help in attaching the main wing to the fuselage later. Attach the level boards carefully, so that they will agree. |
|||||||
PAGE 9-4 |
|||||||