Q1 Plans Chapter 9 Page 9-8
- Details
- Category: Quickie Plans
- Published: Wednesday, 24 September 2008 01:00
- Written by Dan Yager
- Hits: 2525
account for the buildup of glass later on, move the line aft 0.1” . That is the cut line; it should intersect the leading edge of the wing at, or inside of, the fuselage sides. Check this to be sure. If it intersects the leading edge outside the fuselage, you will have to taper and rcnd -he core area outside the fuselage to avoid a flat spot. Cut off the foatri core along the cut line and round the corners slightly so that the glass will lay down properly.
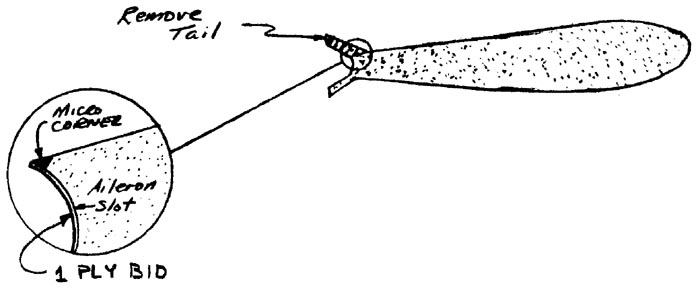
Sand off the “tails” at the aileron slots and smoothly contour the airfoil back to the aileron slot. Put a micro corner in as shown.

LAYING UP THE BOTTOM SKIN AND SPAR CAPS
You are now ready to lay up the bottom skin and spar caps. This layup will require about 2.5 hours and take at least 2 individuals, and preferably 3.
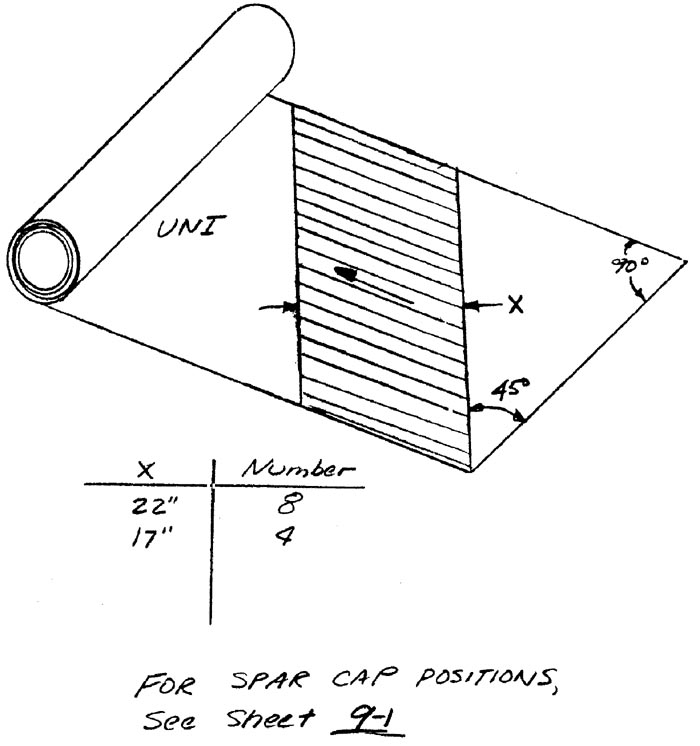
Begin by cutting UNI glass cloth for the skin. Roll the cloth along the cut direction and mark it with the width. The wide pieces(22”) go outboard whi the narrower pieces(17”) go inboard.
Next, reread the aileron construction section and peel piy the trailing edge of the wing outboard of BL52 the same way.
The UNI layup is crossed at 45 deg. to the trailing edge of the wing to provide torsional stiffness. The fibers must be straight, so take your time getting the wrinkles and kinks out. Unrolling the cloth as you need it is advised also to reduce the awkwardness. Use scrap UNI oriented in the same directions to fill any spots not covered by the main skins.
At the leading edge, let the cloth hang down vertically. Trim to within 1” of the tangent pt. Trim the rest of the edges to within 1” also. At the inboard portion where you cut the core for the seatback bulkhead fitting, permit the UNI to wraparound to the bottom of the face.
No overlap is required; just butt fit the skins together. Squeege the cloth well to avoid building up excess resin.

Find the main wing spar caps FG, and H. These will be put on in that order. The easiest way to accomplish this is with three people: two hold the ends of the unrolled cloth while the third removes the frazzles; then the third man stands at BLOO and positions the cap in the proper location (centerline on BLOO and proper distance from leading edge) while the other two individuals keep the cloth off the foam. When the center man is ready, one of the people holding the ends lays down his end of the cloth spanwise and helps remove the wrinkles and kinks. Then, the other individual on the other end does the same thing. Squeege the spar cap well before repeating the process with the next one. Always squeege from BLOO outboard to keep the UNI fibers straight.
Peel ply all of the joints. Peel ply the first two inches of the leading edge.
Knife trim the leading edge at the tangent point before quitting.


