EDUCATION SUPPLEMENT
Rip this page out of your plans and staple it to the wall of your shop.
While it is a handy reference, it's still a good idea to read all
the words in the education chapter once in awhile. Don't skip the
details
- they're all important.
BASIC LAYUP PROCEDURE
-
PREPARATION: Ply 9 or gloves on hands, shop temperature 75° + 10°.
-
CLOTH CUTTING: You-can get by with just a standard pair of good fabric scissors, but the job is much easier with the large pair of industrial scissors (Weiss model 20W). They're $25 (gulp!) but worth it in the long run.
-
SURFACE PREPARATION:
FOAM - Hot-wire-cut surface needs no preparation. Sand ledges or bumps
even, fill holes or gouges with dry micro immediately before
the layup. Brush or blow away dust.
GLASS - Always sand completely dull any cured glass surface (36-grit
or 60-grit sandpaper). Resand if it has been touched with greasy
fingers.
METAL - Dull with 220-grit sandpaper.
-
MIX
EPOXY: Follow all mixing steps shown. on your epoxy balance. Mix two minutes, 80% stirring and 20% scraping the sides and bottom. Don't mix with a brush.
Micro Slurry - Approx equal volums of mixed epxoy and microspheres.
Wet
Micro - Enough microspheres for a "thick
honey" mix.
Dry
Micro - Enough Micro so it won't run.
Wet
Flox -
Thick, but pourable mixture of epoxy and flocked cotton.
APPLY TO SURFACE:
Layup Over Foam - Brush or squeegee on a thin micro slurry layer (thick over urethane).
Layup
Over Glass - Brush on a coat of epxoy.
-
LAY ON CLOTH: Pull edges to straighten wrinkles. If working alone on a long piece, roll the cloth then unroll it onto the surface.
-
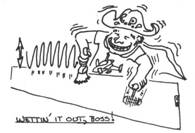
WET OUT: Don't slop on excess resin; bring epoxy up from below with a vertical "stab" of the brush ("stippling") or a squeegee action. Start in center and work out to sides. Most of the time of a layup is spent squeeging. Stipple resin up from below or if required, down from above. "NOT WET, NOT WHITE."
-
SQUEEGEE: If you have excess resin, squeegee it off to the side. Use squeegee with many light passes to move epoxy from wet areas to dry areas.
-
PRELIMINARY CONTOUR FILL: Save sanding by troweling dry micro over low areas while the glass layup is still tacky. This is done at trailing edges, spar caps, or 'over any low areas. The low places are overfilled with micro then sanded smooth after full cure.
-
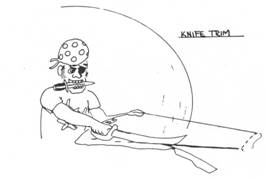
KNIFE TRIM: Save work of sawing and sanding edges by razor trimming the edges at the ."knife trim stage," which is about 3-4 hours after the layup.
-
GENERAL INSPECTION: Take a good look for dry glass, excess resin, bubbles, and delamination before walking away from your wet layup.
-
CLEANUP: If you've used Ply 9 skin barrier, you can get all epoxy off your hands with soap and water. Epocleanse is also excellent for removing epoxy and it returns natural skin oils. Brushes - rinse twice in MEK and wash with soap and water. Throwaway after two to four uses.
|
URETHANE FOAM SHAPING
.....BASIC
TOOLS: Sharp butcher knife, sanding block,
surfoam file, wire brush and blocks/scraps of urethane. Use a dust mask.
Hack away, have fun.
HOT WIRE CUTTING STYROFOAM
.....Hot
wire tool has a lengths of 56".
.....Wire must be tight. The adjustable voltage
control is best, but the job can be done with 212-volt, 6-amp battery
chargers or 12-volt car batterys. Foam block must be well supported
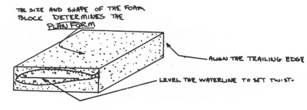
and weighted. Templates must be nailed on tight. First cut the basic
block
to size; this determines the planform size and shape. Level the template
level lines; this determines correct twi st. Set hot wi re temperature
for about 1" travel through the foam in about 4 to 6 seconds with light
pressure. Do the actual cutting at about 1" every
6-7 seconds (8-10 sec. around the leading edge). Practice on scraps first.
|
