Q-talk 38 - LETTERS


- Details
- Category: Q-Talk Articles
- Published: Sunday, 28 February 1993 06:11
- Written by Jim Masal
- Hits: 2560
Hi Jim:
I am not sure I paid '93 dues, if not, here it is. If I did pay '93 dues, here's '94 dues. At 3% interest no one is getting rich.
Would it be a lot of hassle to each year in the second issue to print name, city, state of the members that are still current. See who's still kicking, and flying their Q's. Some builders might be surprised to know there are Q's in their area. I still feel very alone out here ...
I did find a Dragonfly in a nearby town and after pleading and drooling, he gave me a ride. I was really surprised, it wasn't anything like I expected - very noisy while taxiing. He had a hard tail wheel and you could feel every bump and stone on the blacktop.
He did let me fly his bird and it was fast and responsive. Visibility was great. He even did some pitch bucks. Well now with some renewed enthusiasm, I better get to work and finish this project...
Mark Gesler, Lima, OH
Enjoy your freedom to fly, folks 'cause the politicians, the lawyers and your neighbors who don't are taking it away from your children.
Dear Jim,
The experience of others is something to value indeed, and getting stuck into it once again enhances the lifeline aspect of Q-TALK. Thank you for the time and work you seem so willing to devote to us. I have attached some notes on my latest progress should they be needed.
Fitting the elevators to my Q2, GU canard:
A slightly different method. It took me about 10 days to final, including the CS20 tubing and reducers. (I am retired.)
1. Canard mounted nose down. The CS19 tip end assemblies were 5-minuted after determining fuselage clearance.
2. The slot core was evacuated under the 30 inch mark on the elevator, to the mark, inboard for a width of about 1 1/4 inches for maneuvering the CS17 hinge down to the shear web.
3. Temporarily supported the hinges with a block of white urethane foam and 5-minute. Then put the elevators on and slid them inboard. The bushing in the hinge was heard/felt to make contact against the midspan pivot QCSM2. Some sanding was necessary on the outboard side until solid contact of the tip end of the elevator against the washer on the stud of CS19 was achieved. The hinge once again foam blocked and 5-minuted firm.
4. The control tubes were fitted into the reducers, with the phenolics: 2/CS15's and the CS14 threaded on. Then checked for alignment. I used a small magnetic spirit level with square ends to check the phenolic: CS15 was perpendicular to Q2CSA8 tube and again, CS15 and CS14 perpendicular to CS20. All of these phenolics were wriggled into their positions as prescribed by the manual with the universal into CS20 tube. Then foam blocked and 5-minuted.
5. With elevators lying in their slots at best positioning, some very slight adjustment was made to achieve maximum ease of fitting and removal. I did this final touch, by breaking out the CS19's from the tip end, and easing them down on their bases by sanding a little of the base. Or easing them crosswise a whisker, but to get that stud clean straight in and out of the tip end bushing and the circumference of the control tubes to meet up evenly all around with the CS16's inboard. There was not much to lay Q2CSA8 on, since there is only one phenolic, but clear of the universal, tried it for oscillation and went for the mean. I spent a lot of time on this part of it, and comparing an intersection with the CS20, it wasn't hard. Just going for the optimum.
6. With the CS17 hinge still 5-minuted firm, another cut was made into the slot core, on the outboard side and clear. Heavily floxed with one CS18 polyurethane and left to cure.
7. The temporary 5-minute and foam blocks were removed from CS17 and the original excavation cleaned, then sticking in lots of flox, and thumbing in two CS18's. I then glassed my CS17's and 18's down with 2 BID X on each side of the four sides plus one extra ground side and tip side of the hinge. Clearance minimum 1/16 inch.
8. When all was well, the tip end CS19's were glassed. Trying out the elevators once more.
The results of all this is very pleasing. Control tubes that will turn/slide in and out with ease. Elevators that can be removed without a hitch, and simply slide on. The phenolics: except for a bit of one corner for break tube entry (flox holes drilled out), they are set up "as is" on the appendix sheet.
My clearance from CS16 across to CS16, form a check tape through the CS15's, is 38.55 inches. Leaving 8.22 inches of shear web for wheel pant and filling on the right hand end, and 8.17 inches on the left hand. Wheel pants on after post curing, I think.
John Dunn, New Zealand
The following article came from the Dragonfly newsletter, and originally is from a FAA bulletin board.
A SWITCH IS A SWITCH ... OR IS IT???
by Art Bianconi
Some years ago I was fortunate to be able to work alongside engineers from Underwriters Labs (UL) during destructive testing of electrical devices. This was part of my apprenticeship as a designer for a major electrical manufacturer and it was during this period that I acquired an appreciation for real-world differences between AC and DC current and the impact those differences have on switch design and applications.
I share this with you because I am growing increasingly concerned at the widespread lack of appropriateness most home builders demonstrate when selecting switches for the cockpit environment. Each time a builder asks me to perform a pre-FAA inspection on an aircraft, I carefully examine the amp, to date, over THREE-FOURTHS of the projects inspected have turned up AC rated or non-rated switches in DC circuits.
Current is current; What difference does it make DC or AC?
The difference between AC and DC load carrying capability are dramatically non-linear and are best appreciated by carefully inspecting a high-quality switch carrying both AC and DC ratings. Typical of this is the roller and bar micro switches made by MICRO Corp. Rated at 10 amps at 125 or 250 volts AC, the same switch can carry only 0.15 amps at 250 volts DC! In real terms, we have lost more than 98% of the original load carrying ability and all we did was to go from AC to DC! The voltage stayed the same!
But I'm using 120 volt AC switches with only 14 volt DC ...?
Those of you who can still remember the old Kettering coil ignition systems will recall that when the condenser in the distributor went bad, the points generally turned blue and melted down in just a few minutes. Cockpit switches don't have the benefit of the condensers to absorb the electrical inertia present in a DC circuit and as a result, the gap temperatures get hot enough to weld contacts. That includes AC rated switches, even those made with exotic high temperature alloys.
AC current changes directions 120 times a second in a 60-cycle circuit. As a result, there are 120 times each second when there is no current flow at all. The current actually helps turn itself off the moment it sees a gap and the switch designers use this phenomenon to help reduce the cost of the manufacturing of AC switches. In DC circuits, however, the 'push' is constant even when the points begin to open and the resulting flash is DC current's way of demonstrating its resistance to termination.
But won't my circuit breakers protect me ...?
No they won't. Fuses and CB's provide overload protection, and a welded set of contacts will not, by themselves, cause an increase in circuit load. What often happened during UL testing was that the points welded shut, making it impossible to open the circuit. Cycling the switch to the open position was often misleading; yes the lever moved, but inside the switch the cam had separated from the welded points. While it appeared to have broken the circuit, the circuit was, in fact, still hot. If the load involved was your fuel boost pump and you thought it turned off, when in fact it was still running, what would the consequences be? If it were a flap or elevator trim device or a landing gear motor, how would a tripped circuit breaker save you if the activating switch was welded closed and in a mode other than what is required for safe landing?
A DC rated switch will cost you about three times more than an AC rated switch of identical current capacity. If your panel sports switches (which is not likely) the difference will be less that $35. You've gotten this far. Is it worth jeopardizing your investment or your safety by cutting corners with even one cheap or improperly rated switch?
Dear Jim
I recently completed assembling a clever instrument kit sold by Rocky Mountain Instrument, P. O. Box 683, Thermopolis, WY 82443, phone (307) 864-9300. It's called a micro-encoder and fits a standard 3.125-inch hole. It's programmable and thus can be configured in several ways, but its normal digital display shows indicated airspeed, altitude, pressure, outside air temperature, and vertical velocity. By pressing a switch, density altitude, pressure altitude, transponder altitude, true airspeed, and true outside temperature can be displayed. Some of the alerts that can be programmed include gear, flaps and stall for speed and converge, hold, and approach for altitude.
The kit costs $849, can be delivered in two days, and requires about 20 hours to assemble. The quality is high and the instructions are good. I made several calls with dumb questions and received quick, courteous, and useful answers. It's an awful lot of instrument for the price of an encoding altimeter.
I'm still a long way from flying so my experience with the instrument is limited to bench testing. Obviously I'm much impressed. I would be happy to discuss my experience with anyone considering purchase of the kit. I can be reached most any time at (918) 664-5965.
Al Medley, 1716 S. 75th East Ave., Tulsa, OK 74112
Dear QBA
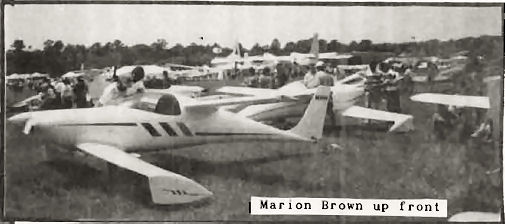
When I purchased my plane, I did not fully realize the excellent value, and it's only now that I am starting to appreciate the amount of money and time saved. My bird was originally Doug Swanningson's kit that was purchased from his estate. When I received the QBA roster, the luck of the Irish was with me. Right at FXE where I fly were three Q birds in one hangar. One Q-2 was flying (Marion Brown), one Tri-Q-200 and a Q-2 about a year from completion (Doug Brablec and Chuck McBride). The value of having four Quickies at various stages has been a tremendous factor in jump-starting my progress. These men are extremely dedicated to quality and detail. They have caught every little point I have not done 100%, including modifications that came out in the newsletter over the years. I could not have purchased a better kit and received as much qualified help and information if I tried.
I hope to soon be able to contribute to other builders as I build hours.
Darwin Fort
Dear Quicktalk
Have found a way to conquer the "fuzzies" when drilling through Kevlar.
1. Drill hole up to diameter needed.
2. Take a wooded dowel which matches the diameter of the hole you want.
3. Wrap this dowel (which is 1" long) with Saran Wrap.
4. Saturate the inside of the hole with fresh epoxy resin. Carefully insert your dowel into the hole.
5. As you can see both the epoxy resin and the tag ends (the "fuzzies") of the Kevlar will pool around the ends of the wooden dowel. This is what you want. Let the resin cure for 24 hours. Pop your dowel out of the hole. I used a 90 degree drill with a #120, 2-inch sanding disc to sand the small ridge of the "fuzzies" down even with the rest of the cowling.
Bingo!! The result is a perfect and concentric hole which hopefully will line up with your nutplates that hold your cowling to the airplane.
Jim Prell
Here's the "video" of the Short Caper reported in a recent back issue of Q-TALK. This doesn't just happen to "the other guy". So be careful and deliberate in your first flight preparations and all your subsequent pre-flights.
Dear Jim
Enclosed is my $20 for 1993. It has been an extremely busy 1992 for me but I have allocated my Sundays for working on my Q-2 in 1993 so maybe by Oshkosh or Ottawa I'll be flying. As you know I had plans to sell her but after my ride with Bob Malechek at the Ottawa Fly-In, I was hooked. I still haven't convinced my wife that it's a safe bird yet but that will come later. Right now we are rebuilding it so it has better resale. It does need some tender love and care.
I do have a couple of requests if anybody out there could help me out. Could someone please send me a drawing on how to build a reflexor? Also, I really liked the brake set up that Bob Malechek has with the two levers on the center console. I'll contact Bob for info on that or if anyone else has any ideas out there, let me know. I also liked Bob's forward sliding canopy.
My other thoughts are:
I get my power from a 64 hp Revmaster and I don't know if I trust it and would like to go to an aircraft type engine. I know everyone has been using the O-200 but if I'm going to the expense of changing why not an O-235? If anybody has any thoughts on that conversion positive or negative, could you let me know? I'll probably keep the Revmaster for now but would like to make a conversion in the near future.
Jim - I would like to thank you for the great job you do in keeping all of us informed. I'm new to the flock and I need all the help I can get in the future. I know how it is to be without help for I come from the ranks of the defunked Prescott Pusher Builders. So keep up the good work and I'll see you at the next fly-in.
Cal Busenitz, Rt #1, Box 85-2, Benton, KS 67017
Dear Jim,
Enclosed you will find a check for the 1993 subscription to Q-TALK. I have recently acquired a Quickie (#219) from Alan Arnold (See Q-TALK Issue #25) who purchased it from Ray Shapard of Riverdale, MD. The Quickie is approximately 80% complete and ready for engine, wing installation and finish. I plan on using the Brock/Jinx installation of the Rotax 503. I was a previous owner of a Teenie Two (VW powered all aluminum plane). This will be my first venture with composites and I'm real excited about it. Fortunately for me I have every issue of Q-TALK that has been published. The reading is interesting to say the least. I am presently involved in a building project (1800 sq. ft. house) on the North/South grass runway at RWJ Airpark in the Baytown, Texas area. It will probably be about 10 months before I can start on the Quickie, but I don't want to miss any copies of Q-TALK. If there are any Quickie enthusiasts in the area I would be more than willing to talk. Thanks for the years of good work of keeping the builders informed. Even though I am new to your literature, I can tell when a good job has been done.
Bobby Keith, 5115 Maple, Baytown, TX 77521
(713) 421-2833
Hey Jim!
The Seattle area recently went to "oxygenated" MO gas. It got lots of media attention for the clean air benefits and also for the potential of absorbed water in the fuel. (Oh great! Does it ever rain in Seattle?) British Petroleum even had large newspaper ads for free repairs of any fuel system problems caused by the change over. (Oh sure, I said.)
My frustrations began with the first few gallons in my 68 VW bus. (Don't laugh like that. We have 294,000 wonderful miles together.) The stock 1580 cc with a Solex H30/31 PICT carb wouldn't idle. Nothing below 2200 rpm, thank you. It's a real pain to drive with toe brakes and heel gas just to keep it running. While examining some Revmaster heads at Bow-Wow's (a Seattle VW shop) I mentioned the no idle problem and the owner laughed and snorted. (Oh geez, now I DO sound stupid. He'll probably tell me it's the centrifugal advance distributor sticking or the wratchenfratz doing the doohickey.)
"Yep. Lots of complaints about that. The oxygenating compounds absorb water and stir up all the water soluble muck and gunk (M&G) in your fuel tank, station and delivery tanks and leaves it in your carb jets. Clean the whole thing and you should have no problems."
Now, all I know about carbs is that they suck air and fuel and make an explosive mixture. Armed with a shop manual and the "Idiot Guide" I jumped in. The VW system has a finger mesh filter in the tank, a cone or flat screen in the fuel pump, and, usually, a paper filter inline pump to carb. Sorry, can't get mesh sizes for any of them. Wellll sheeeeet! The M&G was unbelievable! The needle valves were coated, there were lots of "floaters in the bowl", and the low-pressure idle jets were effectively blocked. The dissolved material comes out of solution when flow, pressure, or vaporization changes (I guess they all change together in a fluid flow.)
I stripped the carb, one item at a time, cleaned then replaced each as it was. (Oh shucks, was that 3 FULL turns off of tight or 3 HALF turns off of tight?) Even the parts - I read later - that were factory preset and must never be adjusted ... Oh well ... cross my toes ...
!!! RUNS GREAT !!!
OK. OK. The point: MO gas components change frequently. Tank hygiene (not ours) ain't perfect. (Who know what was in the last truckload? Molasses?) Weather changes. You go on that first looooooooong cross-country and get gas where it rains a lot, or it rains this year (PHX anyone?)
So your engine was running acceptably and shows up with gremlins and funny rpm changes after a fuel or climate change? One new thing to suspect (do we need more?) is WATER SOLUBLE fuel contaminants precipitating out in the teeny tiny places in the fuel system.
Bob Lane
Dear Jim,
If you had a nickel for every time you heard somebody whine about how slow they had moved the past year, I'm sure you'd be a rich man. Anyway, I'm whining. But, I've started working again and against all odds, I'm going to try to keep at it. It's amazing how motivating it can be to read the newsletter once every couple of months. It's the most exciting piece of mail I get. No kidding.
My wife and I are just about through with the working scale model of ourselves (translation: first child), which will undoubtedly take away some time, but I remain committed to write you with news and drawings of my Q-project's progress in 1993.
Thanks again to everyone who contributes for their efforts to keep QBA alive.
Jay R. Scheevel
Dear Jim
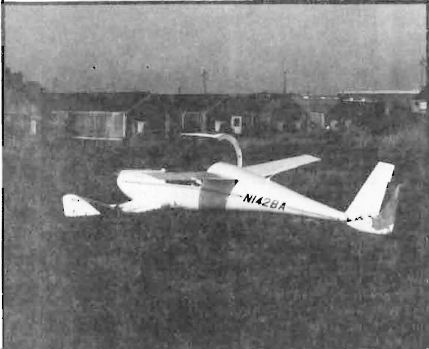
Well, another Quickie has made its first flight. N15GR flew on Saturday, March 20. It was noisy, shaky, a little scary and what else do you expect from an Onan Quickie? The altimeter didn't work (the hole in the plastic plug was closed up) the engine only developed 3000 RPM (don't know why yet) it flew just above the tree tops (I was looking for airspeed and not altitude, indicating 80 MPH and field elevation).
We'll get the bugs worked out and when the weather is right fly it again.
The vortex generators are made out of white plastic arrow fletching available from your local archery shop. For a paltry $3.80 I got enough to do the whole A/C. I put them on with gel super glue and a hair dryer.
I have yet to see another Quickie and I may as you say, "live under a rock" but maybe now I can find some other drivers since I have one.
I didn't pay my dues for 1992 as I was going to discipline myself as I used to do with my six children, by taking away something they liked if a job was not done. "If you cannot work on the Quickie, then you can't read the newsletter." It worked, the Quickie was finished and inspected on November 12, 1992 and since I haven't flown in fifteen years finally checked out on March 6, 1993.
Keep up the good work on the newsletter. I eagerly await every issue and now even more as I have entered that elite fraternity of those who have built and flown their own airplane.
More later on how it flies as we get the bugs worked out. Maybe a Rotax if I'm not satisfied with the Onan.
Elatedly,
Gunnar Rambo
Dear Jim:
Hope things are going great for you during this new year. I am sorry for the delay in getting my renewal to you but it has been a tough year for all of us here and my job has presented new "challenges" during these tough economic times. I have been forced to put the project on the back burner for the past three months. It looks like things will settle down now I hope but time will tell. I have gotten help from John Groff in the construction of the engine cylinder "shrouds" which enclose each cylinder and head with three layers of BID. One and one half inch openings at the top of each shroud supply cooling air and exits between the push rod tubes at the bottom. A very high temp epoxy is used which I got from John and each shroud is post cured in the oven at 450 F. This stuff is amazing in the temp it will endure and how tough it becomes when cool.
I will send more info and pictures later this year as time permits.
Dennis Colomb #2353
Dear Jim,
Thank you for your continued stewardship of the newsletter. My project has basically been gathering dust for the past 2 years and the newsletter is a lifeline keeping the dream alive. A complete accounting of the reasons I have been unable to work on my project would be boring to you and potentially the membership should you print this letter. Suffice it to say that I have had a great deal of pressure in my work and am not earning enough to make it worthwhile. I am currently seeking employment.
On a more positive note, I had the pleasure of receiving a call from Terry Crouch a few weeks ago. He is getting ready to do the final assembly of his Q-1 following painting. He is reluctant to discuss schedules but I believe there is a significant chance that we will see his bird at OSH '93.
Maury D. Cosman
Dear ED,
This has been a very interesting experience. Sometimes frustrating, but mostly fun and rewarding. The frustrating part came mostly from the fact that I had to build the plane long distance. It is in Joplin, MO and I am in the Los Angeles area. Even with a tremendous amount of help from my brother, it was very difficult to pull off. Someday I hope to build another experimental, but not long distance, and I would strongly recommend against anybody else doing it this way. This will probably be my last year since the plane is for sale now (see classifieds - ED.)
I know that I have never written anything for the newsletter, for that I apologize. I am just not very good at writing.
Duane Davis, Carson, CA
ED NOTE: Hmmmmm, that's funny. The ad and this letter seem to be written just fine. Wonder what the problem would've been with a builder tip/report? Anyway, apology accepted on behalf of everyone else.

Jim,
The big news here is that I've recently picked up my O-200 from the shop. I've installed the new cylinders, pistons and valves, etc. from Superior Air Parts (complete package). The big change is that I've opted for an engine driven fuel pump. What an education ....
In order to run both a vacuum and fuel pump you need one very scarce and expensive gear and eccentric (one piece). Fuel pumps aren't easy to find either. I paid through the nose for one of these gears, but before I had it mounted, I had a machinist make wax impressions and take the dimensions of this thing. He needs to make three in order for this to be cost effective. If anyone is interested give me a call ... The fuel pump is the same as a Carter that's commonly used on a Wisconsin engine, except for the arm. (I have a spare that can be copied.) ... Divco in Tulsa will machine the case and install the studs for the pump mounting. Here's the part #'s:
Pump-Cont. #631391
Gear & Eccentric-Cont. #630403
Pump-Carter #M2152
I have installed an aux. fuel tank in the baggage compartment and this appears to be the solution to a simple fuel system. My other design using a header tank got to be pretty complex, requiring overflow from the aux. to go back into the main, also two valves and a cross-feed.
The installation will allow me to run one valve to select either tank, or the off position.
Be aware that Pump #40585 is the wrong one for this type of installation (vacuum and fuel).
Allen Kittleson, 820 Royal Meadow, Denton, TX 76201
(817) 387-4453
You can order a PDF or printed copy of Q-talk #38 by using the Q-talk Back Issue Order Page.