Tri-Q Fairing Construction
- Details
- Category: TriQ Plans
- Published: Tuesday, 28 December 2010 15:47
- Written by Scott Swing
- Hits: 5020
There are basically 4 fairings, 3 of which are premolded. One of these you will fabricate yourself. First we will work on the two fuselage to gear fairings.
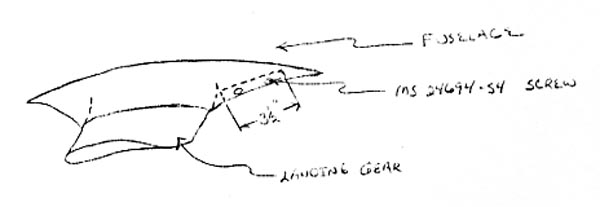
Trim the fairings to the lines. You will be making a lip just as you did before on the main wheel pants. Rough up the inside surface just above the split. Gray tape the inside surface on the bottom side of the split. Knife trim the edge, put it together, and gray tape the outside of the split. Now, using 3 BID strips, 2" to 21/2" wide, glass the inside across the split only about 3 1/2" in the middle so you don't have any glass going to the ends. This is done because of the interference caused at the fuselage and gear when the whole thing is glassed.

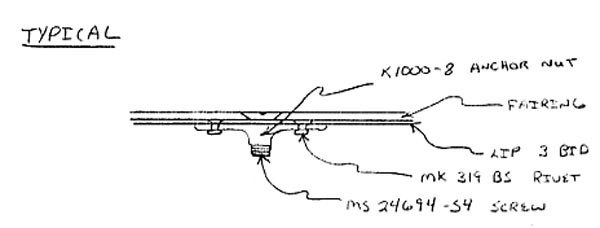
After cured, remove the tape and break it loose. Don't get carried away or you will break your fairing. Remove the inside tape and trim the lip to 5/8" as before. Let the fairings come back together and mark the two holes 2-1/4" apart in the center of the split. Drill the 1/8" holes and install the K1000-8 8-32 anchor nuts with the MK 319 BS flat head pop rivets. Again conntersink the holes to allow the MS 24694-S4 Screws to fit flush with the surface of the fairings. These fairings are now ready to install.

The nose gear fairing comes in two premolded sides with an indentation in the leading edge for glassing the sides together. Trim the fairings to the trim lines and fit them together to check for fit. Sand the indented portion then tape the trailing edge together. Five minute epoxy the leading edge of the fairing just enough to hold it in place. Glass the two together with 2 BID. After cured, you will remove the tape and finish the transition of the BID lay-up. This fairing will then stretch and slide over the gear leg when installed.

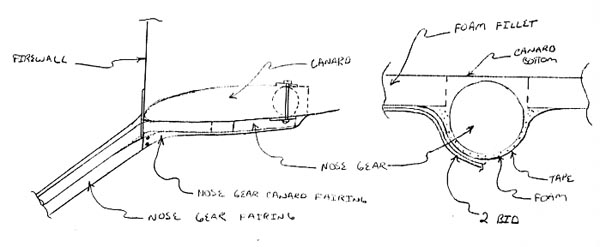
The last fairing extends from the firewall back to the rear attach fitting of the nose gear. The reason this fairing is not supplied is because of the differing bottom contours of the airplanes.
Put the nose gear fairing in place with tape to hold it where you want it. Using strips of foam (blue or orange), cut a groove down the center just deep and wide enough to fit over the gear. It's easier to do this in small pieces. When all the pieces are fit, gray tape the gear and 5 minute epoxy, in place, the foam chunks. After cured, sand and shape the foam chunks to a pleasing shape. Then gray 'tape over the foam and onto the bottom'of the canard or cover piece under it. Try not to overlap the tape. Wax the tape with anything. Glass over the tape with 2 BID @ 45° onto the canard about 1" on each side. When cured, pull it off, trim it, and finish the surface. Remove all of the foam and tape. This cover is now ready to install.
|
NOTE:
|
It is best to paint all wheel pants and fairings off the airplane after they have been installed and checked for fit. | |


