Q2 Plans Chapter 14 Page 14-08


- Details
- Category: Q-2/Q-200 Plans
- Published: Wednesday, 17 May 2006 15:05
- Written by Quickie Aircraft Corporation
- Hits: 2853
|
CONTROL STICK INSTALLATION
..... Install the control stick only after the fuselage has been assembled and the fuel tank, center console, and side consoles have been installed. .....The control stick is installed on the center console so that it may be actuated by either the pilot's right hand, or by the passenger's left hand. .....In order to make your Q2 have that "custom fitted" appearance, sit in the cockpit in a comfortable posit¬ ion that allows you to both see out of the cockpit and reach the rudder pedals. Rest your right hand on the center console and estimate where the control stick should be placed fore and aft to .be most comfortable; mark that point somehow for future reference. .....Next, assemble QCSA1 to QCSA2. It is important that the bolt tighten down on the spacer, not QCSA1, to allow the stick to pivot freely. .....Find the QCS3 spacer material and cut it into two pieces. Also, find the three phenolic bearings CS1 and CS4 (2). .....Study the sketches carefully. CS2 is the longitud¬inal aileron torque tube, which is made out of 3/4" 0.D. by 0.035" wall 202413 Aluminum tubing. It needs to be approximately 44" long, but, as you can see, the exact length will be determined on installation, so make it long. CS2 translates the rotary motion of the control stick (for roll control) back to QCSA3, the aileron bellcrank, from whence the two vertical push pull tubes CS5 and CS12 actuate the two Q2CSA41s which move the ailerons. .....From your previous determination of the proper control stick location, you can decide how much to trim back the center console so that the CS1 bearing can be attached with flox and 2 Blp at the forward edge of the center console. 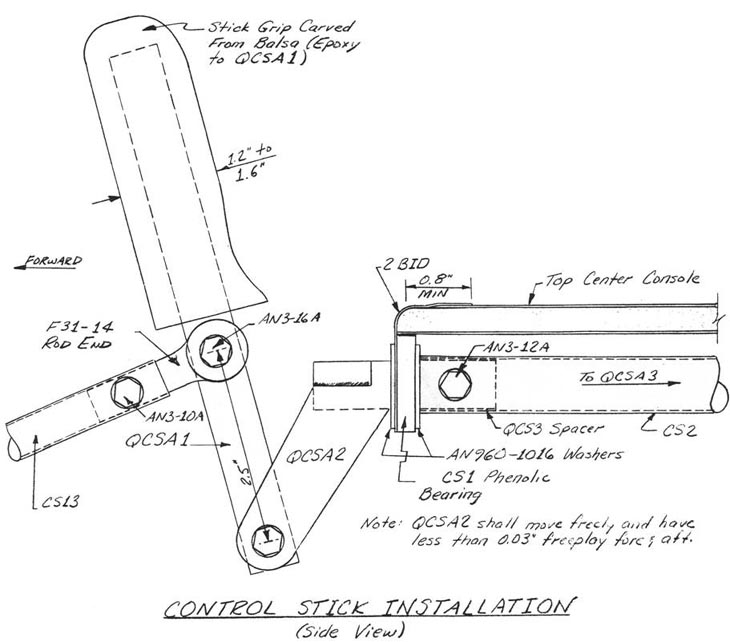 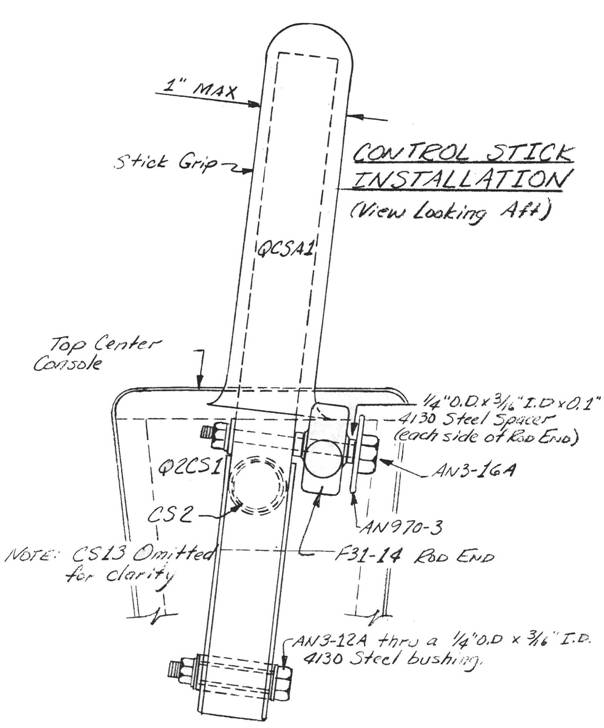 |
||||
CONTINUED ON NEXT PAGE |
||||
PAGE
14-8 |
||||