Q-talk 72 - THREE NEW FIRST FLIGHTS


- Details
- Category: Q-Talk Articles
- Published: Saturday, 31 October 1998 06:11
- Written by Tom Moore
- Hits: 3201
QBAers,
Well another year has passed. Last year was a good year. A lot happened, some good, some not so good.
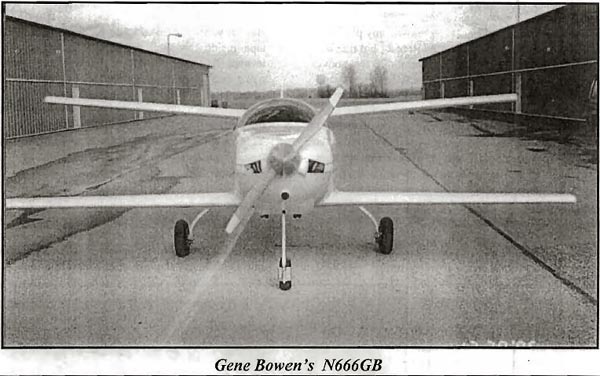
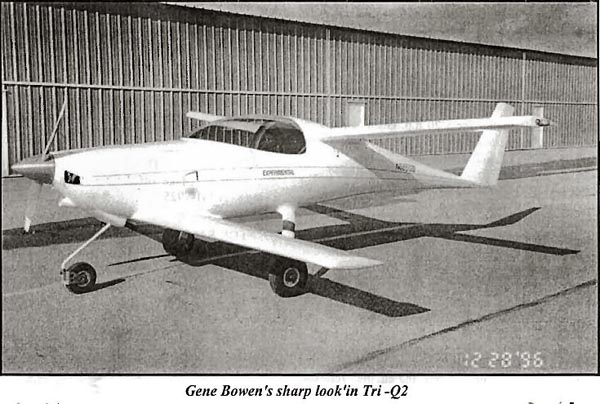
Tri-Q N666GB construction is complete. Inspection and sign off was done March 26, 1997. First flight was July 31. When I have more time in the aircraft I will write a report. Build time was 2972 hours over a six year period, empty weight is 661 lbs.
Ground control was very stable but the nose gear was "glued to the ground". About a quarter inch of reflexer lightens the nose considerably. After talking to several other builders I came to the conclusion the canard angle of attack was low. I installed it at plans angle. Other builders suggested I should have put in at least one to two degrees of positive angle. Other builders tell me the LS-1 canard has much greater stick force.
Lift off was about 85 mph. Preliminary pitch-buck was between 75 and 80 mph. The only problem was the airplane took too much aft stick pressure. Landing was uneventful with touchdown at about 80 mph.
The Revmaster/Posa combination ran well, all temps in the green. Getting the fuel mixture rich at all speeds has turned out to be a challenge. I am still trying to get it right.
I bought the Revflow carb to replace the Posa, but it is not a direct replacement and not that much different functionally. A bad investment for my installation.
I have ballasted for the nose heavy conditions and am still working on the mixture problem while waiting for spring.
The panel is equipped for day/night IFR. Nav-Com w/glideslope, xponder, blind encoder, GPS and intercom. Vacuum system is an engine mounted pump.
Gene Bowen, Waverly, Ohio
Getting there!
After nearly 10 hours of taxiing at different speeds and fixing the alignment problem (using David Gall's procedure) that my Q2 powered by a Revmaster 2100D had, I knew I was almost there. In Canada it's not mandatory to have a tail dragger checkout, but I took 4 hrs of flight time on a tail dragger with an instructor, at that point I had learned that a tail dragger is different. I then wanted to see what it looked like on approach in a Q2. I was fortunate enough to be able to do it with Michel Moreau in his Q2 who has a couple hundreds of hours under his belt. I also had the privilege to take a ride with Bob Malechek last summer and Michel also let me fly his bird for an hour and a half. I knew that once I was up there it would be OK, but I'd eventually have to come back down and that's what I wanted to see. Next I wanted to see some pavement coming at me by myself so I rented a 172 and did some touch/go's at 85-90 mph with no flaps to get a feel for the speed since it has been a while that I had flown a speedy plane. My previous year flying was mostly in a UL Challenger at a landing speed of about 35 mph. Just to help my confidence on the week I had planned to do my first flight there was two crashes and four victims and I knew them all, even talked to them before they took off ...., is there a message here????
In the middle of the week I decided that it was time for the first flight, but backed off after hitting a bird on my way to the airport, my mother always told me that a bird that hits a window is bad luck, it was the perfect night with no wind.
Am I loosing this battle or what? Saturday afternoon after doing another check of the plane, I had planned to be back the next day at 8:00 a.m. and in the air by 9:00 a.m.
I'm really focused now and reviewing in my mind all the steps. It's 5:00 a.m. the next morning I'm sitting in my bed and can't fall back to sleep. 7:00 a.m. turns around and I decide to go to the airport, this time a whole flock of birds pass in front of the car and I'm telling myself "no, not this time birds, you are not going to influence me." The plane is ready and I'm telling the tower that I will be doing a couple of taxi runs (see if I can still do it). Yep I'm still in control. Told the tower that I would be backtracking this time to the opposite side for takeoff. Now I can feel their voices changing, they have seen me for the last 4 months doing all this taxiing and wondering if this thing could fly. So here I am sitting on the numbers at the end of the runway and doing my last panel check and rolling a little because of a down slope. So I decided to make a 360-degree and now have the numbers and the whole runway in front of me. The tower then asked me if I was going to continue taxiing or takeoff? So my answer was "it's a hell of a good question". Looked again and progressively went to full throttle and .... I'm off the runway. My plan was to make 3 approaches at 200/100/300 feet, but the first time around I felt good enough to go for 20 feet above the runway and make a fly-by. After the second approach I climbed up to 2500' and did a power off stall and was very happy to see 62 mph with the LS-1 canard. I went for one more approach and on the next downwind I knew it was going to be the right one. I kept my speed at 85 mph and the descent was constant and nothing had to be adjusted to make it on the numbers. Kept looking forward and kept the nose straight down the line and pulling on the stick as required until I felt the runway and now I was on it and going straight and a fast look on the airspeed indicator showed me 60 MPH, well I knew this area and I had seen it in taxiing so many times.... Hey!!!! I made it and I'm in control, so I just pushed the PTT and screamed YEEEEEESSSSSSSSS. Next thing I hear is "C-GYZC can you clear the runway?" Oh, I forgot I can't stay here .... I was just enjoying the moment.
Such a smooth landing, I'm still trying to make another one like it.
Michel Royer, Val Des Monts, Quebec, Canada
Tom,
This morning Q2 Rev. N17OR (approx. 80 previous hrs. by last owner/builder) lifted off from Fleming field in St. Paul, MN with me at the controls! Temp was mid-70's with about 10 knot variable crosswind, takeoff roll only showed 2800 rpm, the split second I glanced at it, and I don't know the speed at liftoff!! Still only showing 2800 rpm I climbed at 100 mph at about 5-600 fpm, oil temp about 200, everything else in the green. Leveled off at 3000 ft and leaving the power up showed 140 mph @ 3000 rpm, speed might have increased but wanted to do some "getting used to" stuff like stalls... Barely felt this pitch buck thing! approaches with and w/o belly board while using the reflexor ...And slow flight during turns. Very impressed with the handling. Now, back to the pattern ... I entered downwind @ 100 mph with belly board down and reflexor set up for landing as I didn't want to be doing any "fumbling" in the pattern. Turned base, went to 90 mph and on final was about 85, when I last looked! This was to be my first practice approach and I think I was a bit jerky on the controls. I flew down the runway and went around. The second approach felt so good I bled power; let it fly right on to the runway without trying any stalling stuff! I didn't do any braking; it went straight with little rudder (ala Dave Carlson alignment!). If all my landings are like that I'll be REAL happy!! So now... I got a hole in my panel and am looking for a nav/com or com and a GPS, any out there? Will be seeing ya'll at as many fly-ins as I can get to!
Richard T. Wilton, Richfield, MN
P.S. To those of you that I mentioned a selling price to when I felt "bummed" about this Q2 stuff ... THE PRICE JUST DOUBLED!!
QBAers
For those of you who are still building/dreaming and not flying your Q birds yet (we seem to be outnumbered heavily by all of the lucky souls who are out piling up fun packed hours boring Q shaped holes in the sky) here is a little technique that I developed for fuel tank installation. I showed my method to a few folks at Ottawa and have mentioned it to a few other builders and have been rather surprised that it hasn't shown up yet in the last 17 years or so of Q building and Q-Talks. What follows is not what you might call a "major" deviation from the plans. It is merely what I consider a cleaner and more craftsmen like installation. It's ultimately a more leak proof or contamination-proof set-up. IT DOES NOT REPRESENT A SIGNIFICANT AMOUNT OF EXTRA WORK OVER AND ABOVE THE QBA PLANS EITHER. I FOUND IT TO BE A SIMPLE PROCUDURE AND RATHER ENJOYABLE TO BOOT.
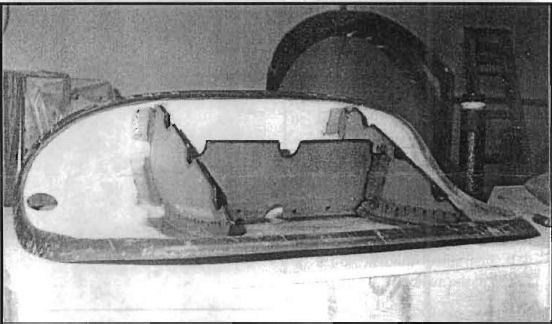
Basically, all you have to do is lay down some duct tape inside the shell where the fuel tank will be located (Red Green would be proud of me, "when the going gets tough, the tough get duct tape"). The duct tape makes a fairly good mold release. All of this assumes that the tank has been fitted and located and the outline traced onto the shell with magic marker. You must also mark some centerlines on your duct tape. You then lay 2 layers of BID on the duct tape, finishing off on top with Peel-Ply. I used 8 pieces total, 2 for each side because we all know that BID doesn't like bending around those sharp 90-degree corners. Once cured you can then pry the layup free of the duct tape. I used a paint scraper and tongue depressor stir sticks. Be patient, it won't just jump off of the shell and leap into your hands, but don't worry too much because it's strong enough that it probably won't crack or break if you're a little too aggressive. Also, mind your hands, as those prickly little glass needles on the edges of the layup can turn your skin into hamburger.
The first time I tried this technique I put the tank onto the wet BID during this first step - DO NOT DO THAT - FOLLOW THE NEXT FEW STEPS OUTLINED INSTEAD. If you attempt to do it in one step the unit will be so rigid that I can almost guarantee that you will expand the English language with new four letter words you never thought existed when you go to spring the unit off of the duct tape "mold release".
You then reposition the new "custom flange" back in the shell, (don't cut it back or sand it to shape until after it is firmly installed on the fuel tank.) You can now mix up some flox and bond the tank to the flange, in position, inside the shell. Just use enough flox "beads" to get it firmly bonded in several places. You don't want to fuss too much here, as you don't want the tank or flange to move out to position on you while you are bonding it. Once this has cured you can pull the whole shootin' match out of the fuselage and finish putting in a nice wet flox radius all of the way around the perimeter on the INSIDE. I used a micro radius on the outside of the shell simply to save weight, as this side is not exposed to fuel. You can now sand/cut the flange back to a nice smooth curve that follows the fuel tank perimeter. I left about 1" on the outside and sanded it flush to the flox bead on the inside.
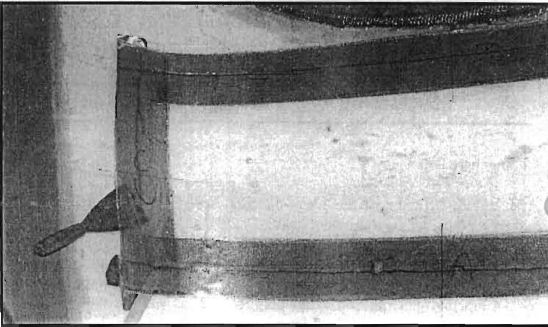
The fiberglass layup on top of the header tank ready to be floxed in place.
Before installing the tank permanently I sanded the inside of the shell to prepare it for a big piece of BID. I laid a wet BID "blanket" down underneath each tank so I can sleep nights knowing that no fuel is ever going to seep into my shells ... I "painted" some very wet flox onto the bottom of the flanges and then pressed this onto the wet BID "blanket". You then put in your 2 BID tapes all of the way around to finish the installation. Your BID "blanket" should be protruding out about 1" to 1 1/2" all of the way around so that your BID tapes can run flush to the edge of the "blanket".
If you are installing the QBA plans fuel gauge you will have to be careful about not having your float glued to the "blanket" on the bottom, been there, done that.
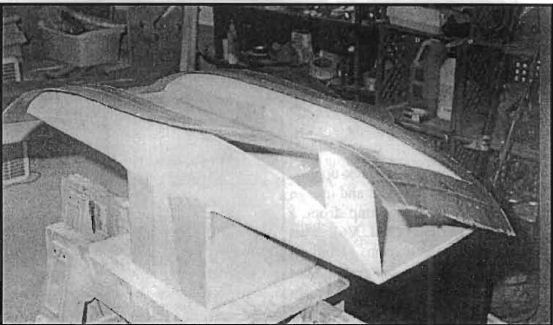
The main tank with the fiberglass layup already in place and trimmed.
Some other things that are different about my fuel tanks:
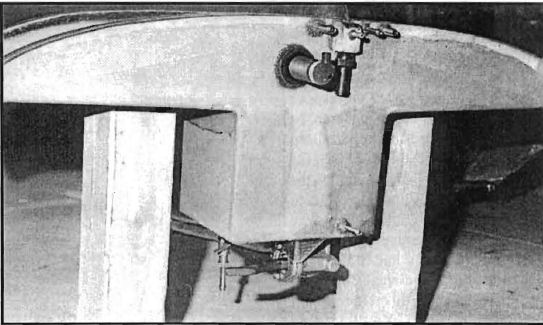
1) My return line is a 90 degree elbow threaded to a 5/8" hose barb external to the tank rather than the QBA tube inside. The vent line is floxed into this elbow and bends about an inch down into the barb (following the Q200 scheme).
Here's the main tank in the fuselage ready to be fiberglassed in.
2) I am using finger filters in both tanks rather than the permanently floxed in screens in the plans.
3) My manual back-up is completely independent and uses a cam operated fuel pump from a 1983 Ford Cougar (3.8L V6). This was copied from Kimbull McAndrew. This pump displaces an incredible amount of fuel with each stroke and can easily be actuated with your right foot. It is extremely reliable and weighs a mere 14 oz's. It will always be there when you need it most.
Header tank and multiple fixtures ready to go in.
4) I am using a Balluff 30 mm capacitive proximity sensor screwed into a phenolic donut on the front of the header tank to sense low header level and flash a light on the panel. I know I have a sight gauge guys, but I've read too many NTSB reports about Q's going down with empty headers. I feel that the red flashing idiot light will guarantee that I won't be asleep at the switch.
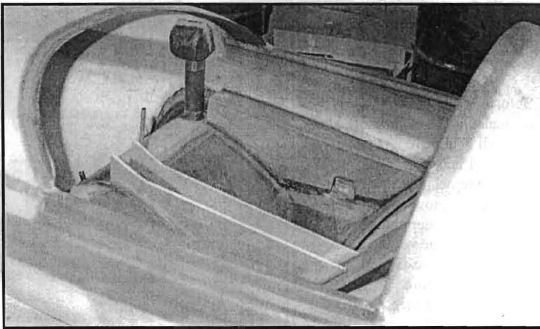
Here's the main tank in place and set. Kris is doing a quality job.
Kris Browne, Belle River, Ontario, Canada
You can order a PDF or printed copy of Q-talk #72 by using the Q-talk Back Issue Order Page.