Q1 Plans Chapter 11 Page 11-5
- Details
- Category: Quickie Plans
- Published: Sunday, 31 August 2008 01:00
- Written by Dan Yager
- Hits: 1978
MOUNTING THE WHEEL PANT
At this point, the completed canard should be jigged upside down.
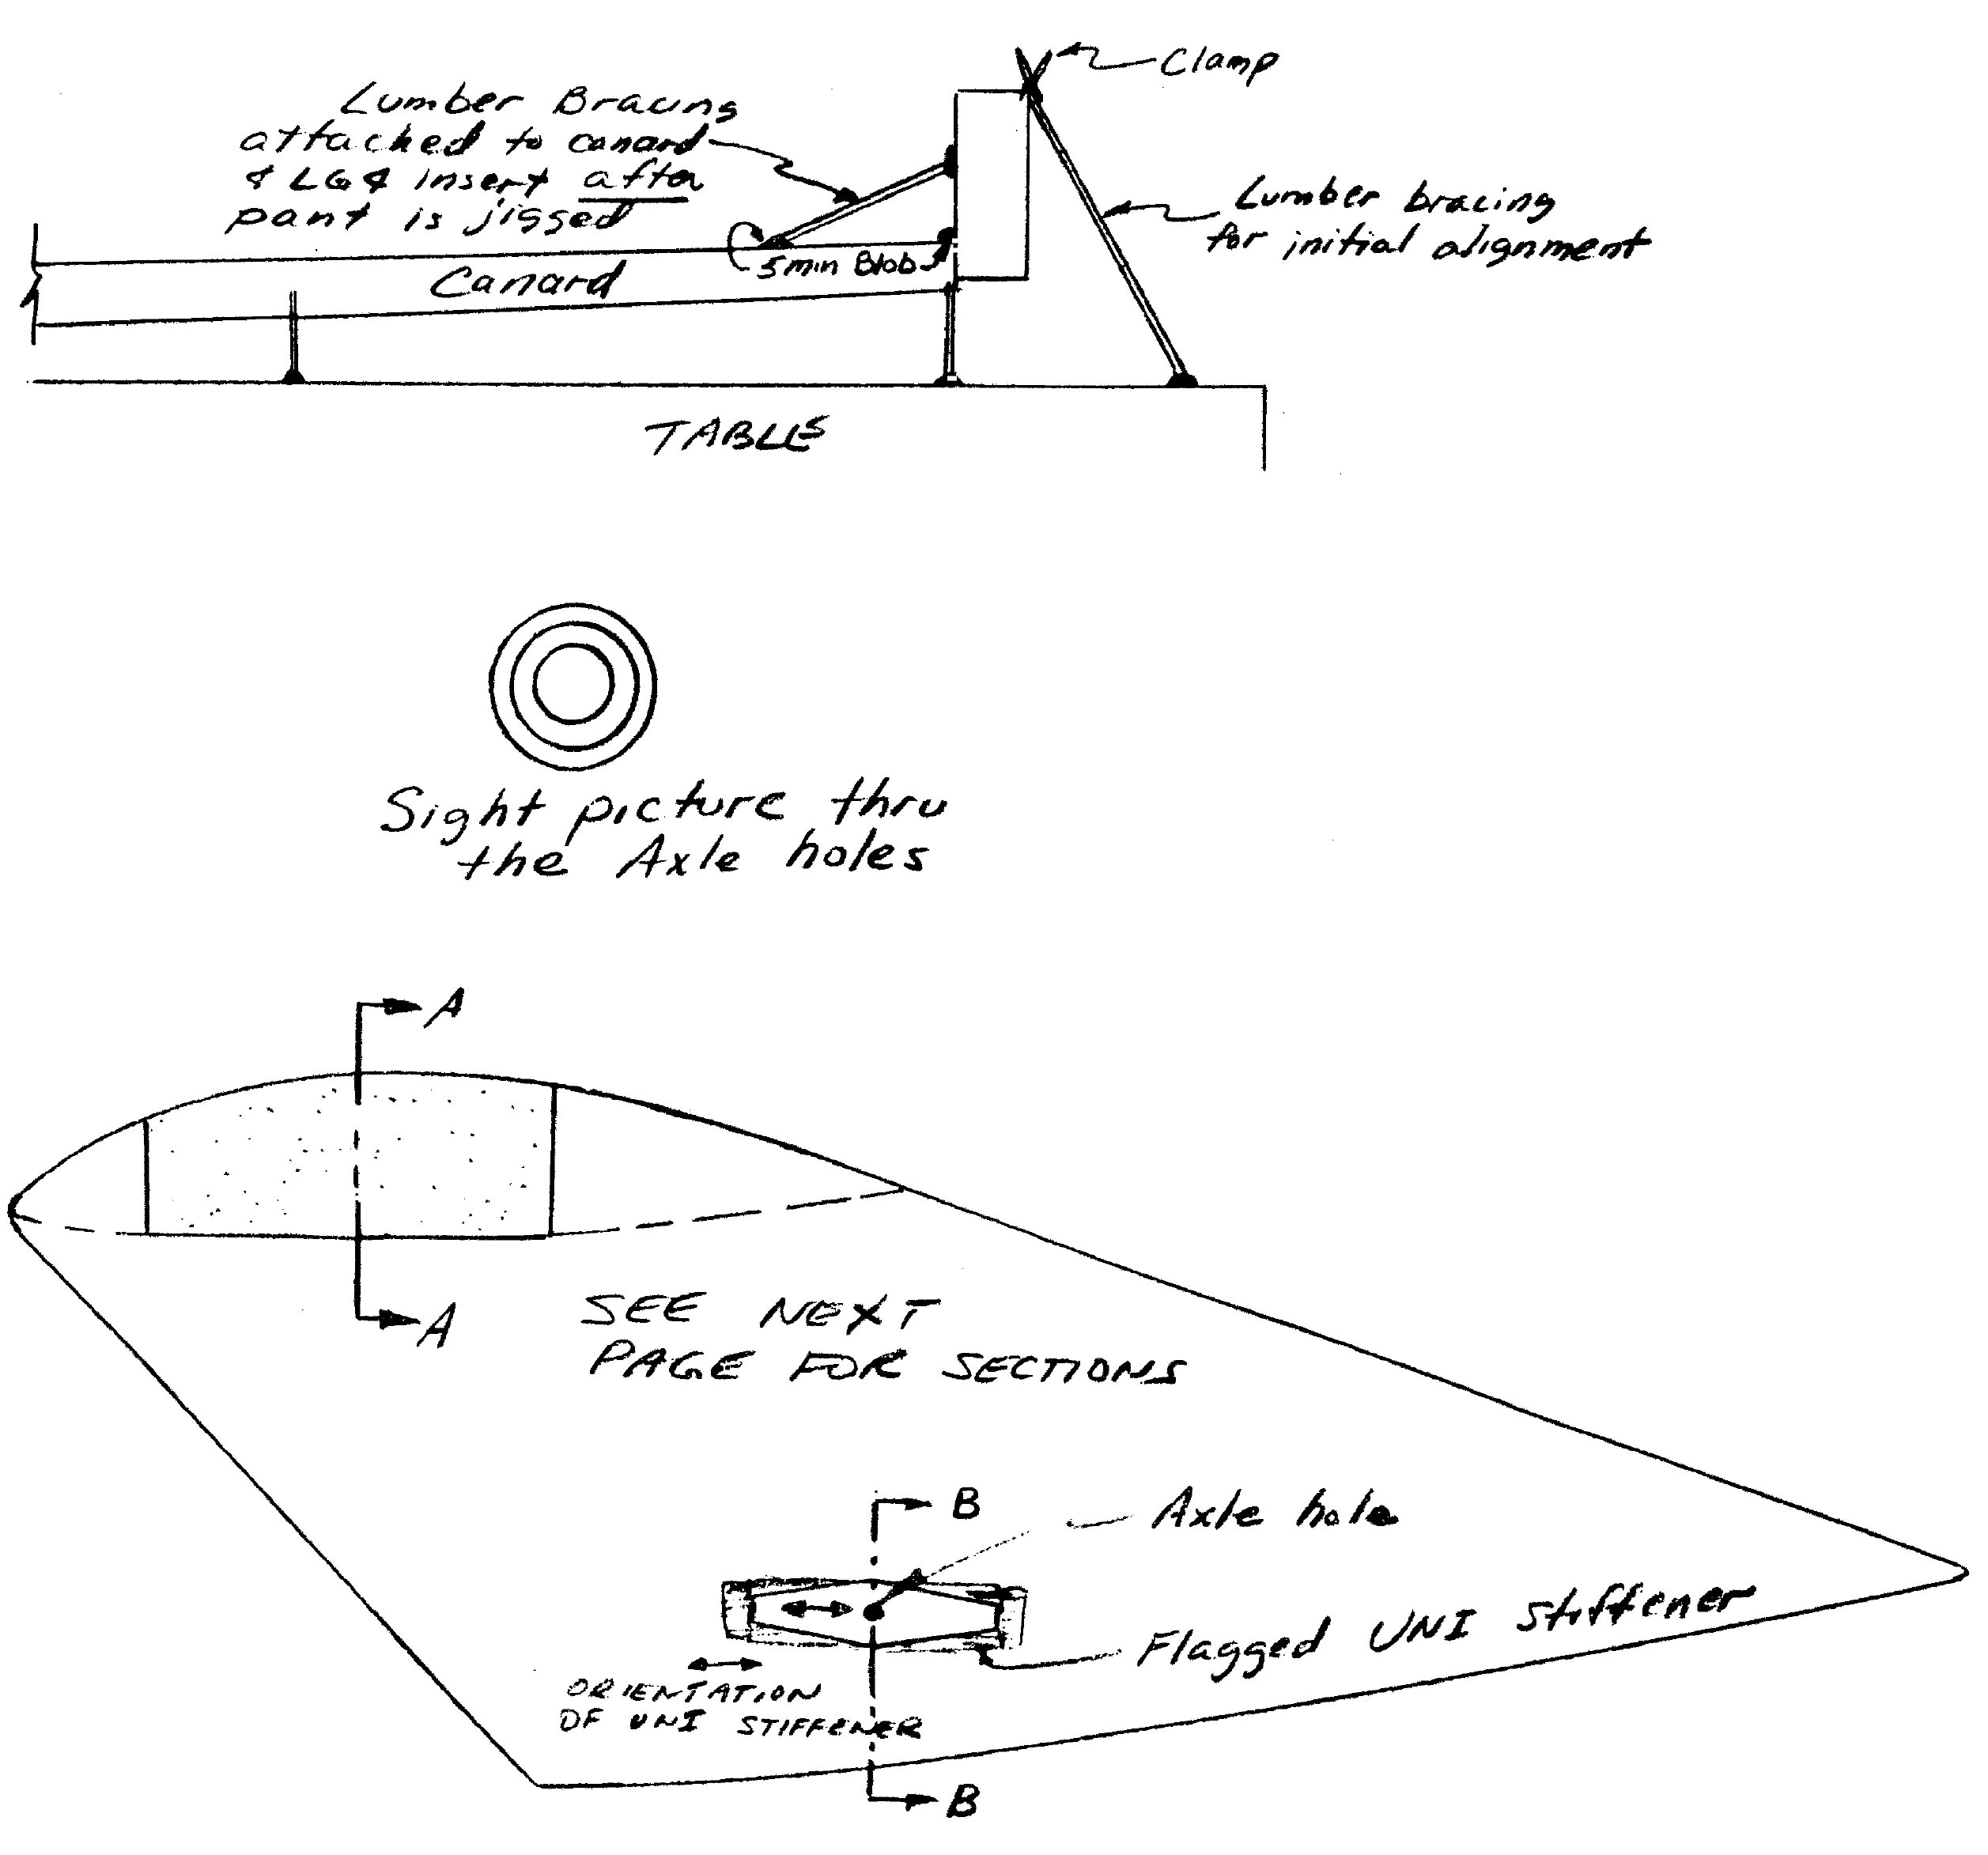
Basically, each wheel pant is jigged in place using lumber for bracing, then the toe-in and camber is checked, which usually necessitates some adjustment to the lumber bracing. When everything is jigged properly, 5-Minute blobs are used to attach the pant to the canard and a piece of lumber is attached between the LG4 insert and the canard so that the assembly will not move.
Begin by rigging the wheel pant in the approximate position. Bracing is used to keep it firmly fixed. Sight thru the axle holes,keeping the two holes in the wheel pant concentric (like sighting thru the sights on a gun). Move the wheel pant until the line of sight approximately intersects the other canard tip where the axle holes on that wheel pant will be located. Bondo the lumber in place.
Next, repeat the operation with the other wheel pant except that now you can actually sight on the opposing wheel pant axle holes.
The objective is to be able to sight through each wheel pant and see the other wheel pant axle hole lined up in the “sight”. The process is iterative until you can confirm that a bullet fired along the sightline through each wheel pant will go right thru the opposite wheelpant axle holes. At this point you have 0 toe-in and 0 camber, which is what you want. Some minor trimming of the canard tip may be necessary so that the wheelpant fits flush against the canard tips.
Now, turn the canard over and jig it right side up, being careful not to change the alignment of the wheel pants.

CONTINUED ON NEXT SHEET


