Q1 Plans Chapter 13 Page 13-3
- Details
- Category: Quickie Plans
- Published: Monday, 12 May 2008 10:28
- Written by Dan Yager
- Hits: 2068
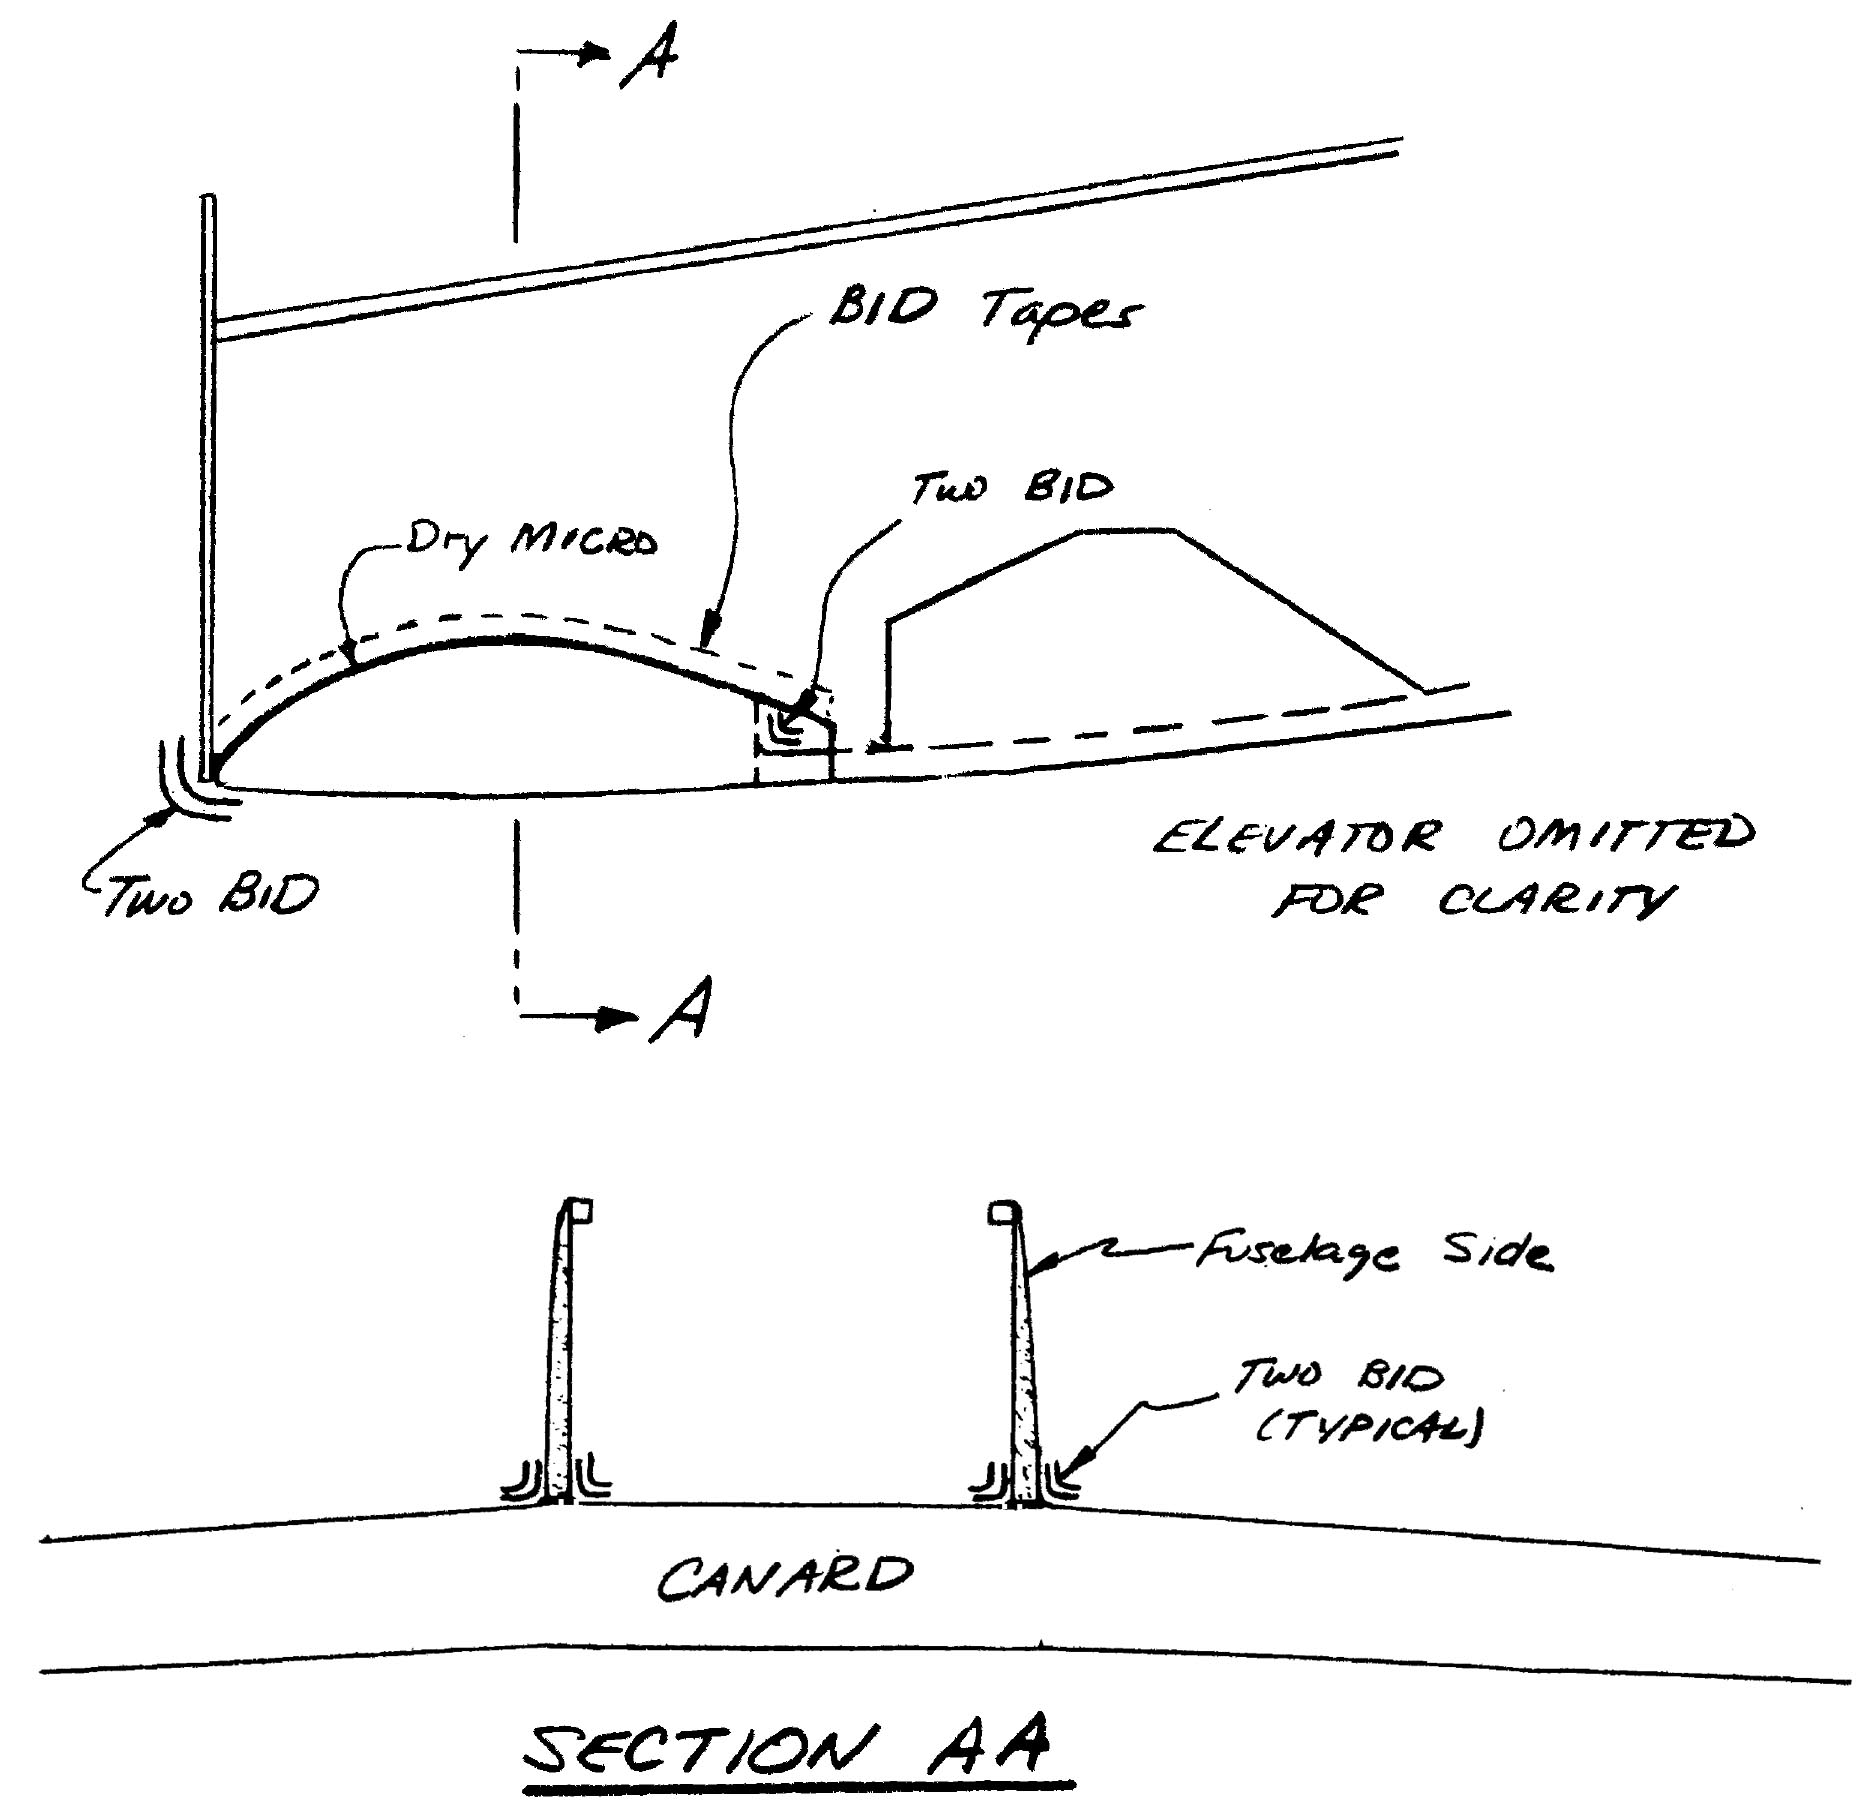
The canard is permanently attached to the fuselage with 2” BID tapes on both the inside and the outside of the fuselage.
Begin by leveling the fuselage both longitudinally and laterally. The fuselage should be high enough off the ground that the canard can be slipped under it and up into position without noving the fuselage.
The procedure for fitting the canard to the fuselage is one of fitting, then trimming, then fitting again until the canard smoothly mates to the fuselage.
Some important points to remember as you are doing this work are:
- When the fuselage sides were made, the BL10 canard template was used to approximate the cutout. This cutout will have to be trimmed to fit the real canard.
- The level board on the canard must be level when the canard is joined to the fuselage. Recheck fuselage level also.
- Avoid having to use lots of dry micro to fill voids during the final mating process by being careful in the trimming process.
- Check to make sure that the canard centerline is on the fuselage centerline.
- Check the skew of the canard by measuring the distance from the axle to STA172 (where the tailspring meets the fuselage) on each side. They should be equal.
When everything is ready, mix up dry micro and apply it liberally to both the canard and to the fuselage wherever the two will mate. Gently lower the fuselage into position on top of the canard. Make sure that you obtain good squeeze out everywhere and then remove the excess.
Now, once again check the level of the canard and fuselage, as well as the skew of the canard. When you are sure that everything is absolutely perfectly lined up, leave the aircraft alone for about a day in order for the micro to cure.
Then, you can begin applying the BID tapes that provide the real strength. Note that two tapes are used everywhere both inside and out.


