- Details
-
Category: Safety
-
Published: Sunday, 27 October 2013 13:15
-
Written by Sam Hoskins
-
Hits: 21417
[Editor's Note: As you may be aware by now, Sam and Sandy Hoskins suffered a mishap on their way to the Field of Dreams Fly-in at the end of August. Sam is a high time Q-200 pilot, who has served as a great ambassador for our group as well as serving as a flight, safety, and build advisor to many of us.
After a fuel stop in Pennsylvania, Sam decided to use the extra 500 feet of runway afforded by the displaced threshold for RW17, for takeoff. Normally this decision would have given them an extra margin of safety, but in this case it resulted in a collision with a known hazard in the form of a large pool of water, at high speed, right at the end of the threshold.
We were all very bummed to hear about this incident at the fly-in, but we were all VERY grateful to learn that Sam and Sandy walked away. I am also grateful that experienced pilots like Sam, not only have the guts to share their triumphs and boo-boos with this ornery group, but also the wherewithal to start putting things back together so they can fly another day.
I am placing this story in the SAFETY section of the website, because there are certainly lessons to be learned here. You will never live long enough to make all of the mistakes yourself. So, let's take this opportunity to learn from those of others, and help in any way we can to get Sam “back up on that horse again!”]
Here We Go Again. . .
Reprinted from Sam's Blog: http://samhoskins.blogspot.com
|
|
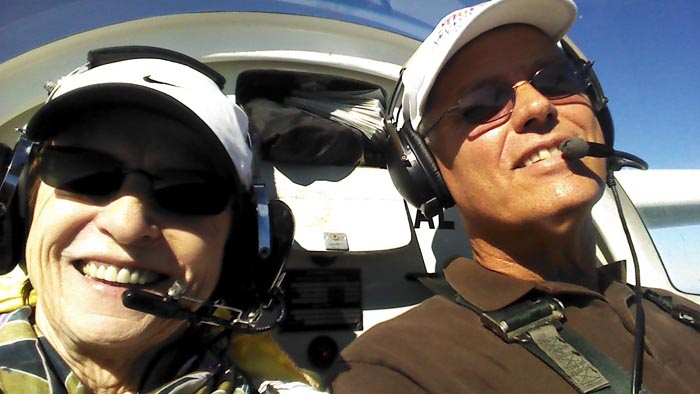
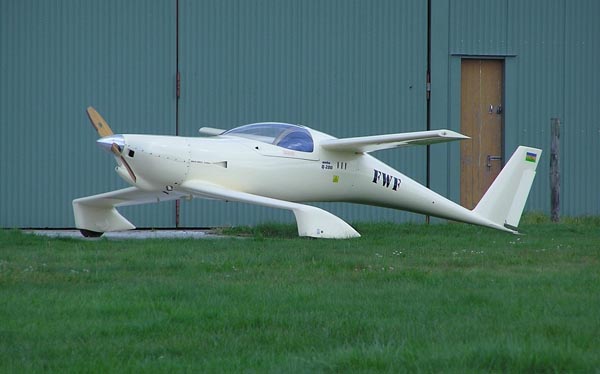
| On our way to Orange, MA. Little did we know... |
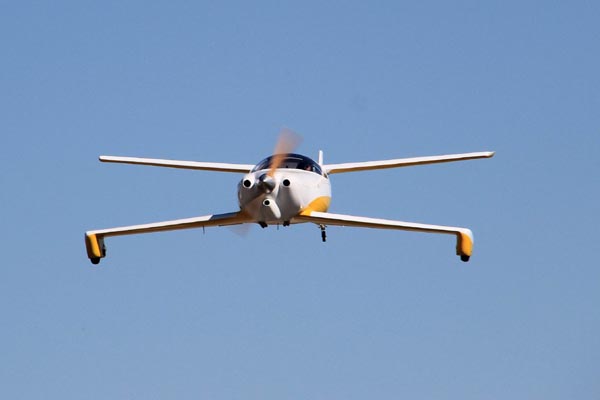
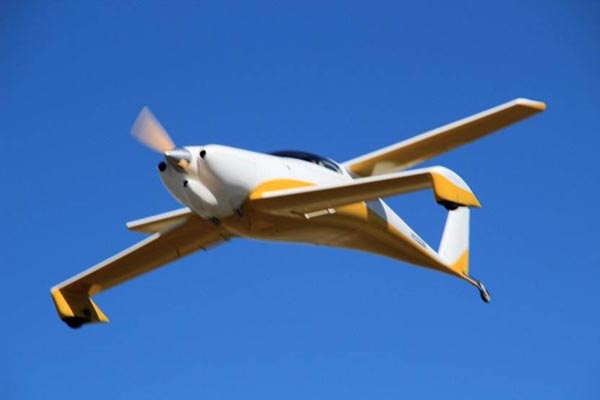
It was too good to be true. Plane was running great and Sandy agreed to accompany me to the Tandem Wing Field of Dreams event, held this year in Orange, MA. Our annual gathering of Quickie type aircraft. Orange was going to be a long trip, but I have never flown the Quickie in that part of the country before, so we were planning a little additional sightseeing.
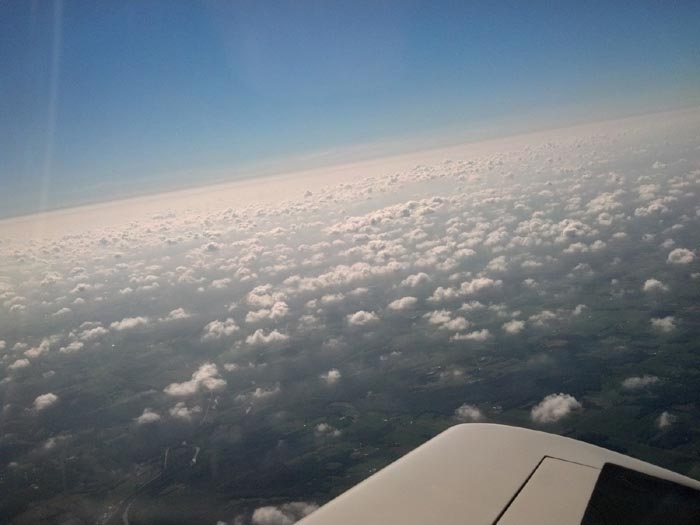
It was a nice day and the weather looked good for the whole route. Actually, my fuel injected Quickie Q-200 has enough fuel to make it non-stop, but we decided to take a break and land at the Zelienople Municipal Airport in Western Pennsylvania. Just try and pronounce that name.
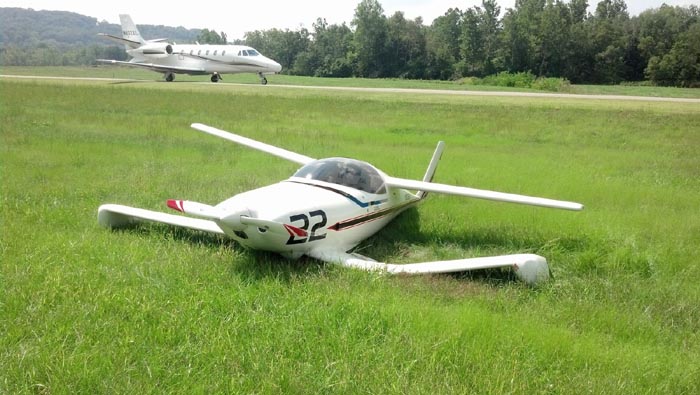
When it was time to depart, I used Rwy 17. Since there were hills around and the light winds were shifting, I elected to use the displaced threshold, which is about 500 feet long. I put the pedal to the metal and accelerated normally. All of a sudden we veered to the right. WTF?!?! We went into the grass, across a connecting taxiway and down a shallow embankment.
|
|
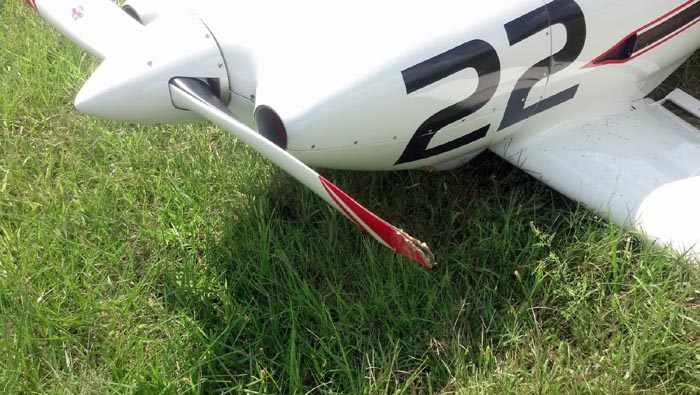
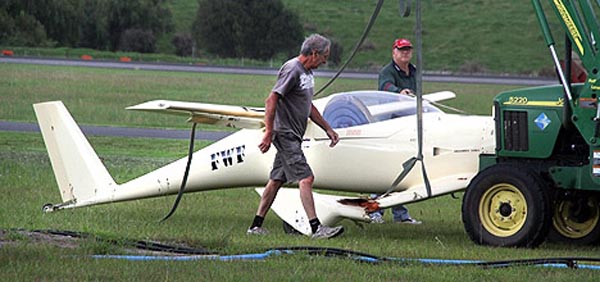
| Taken perhaps five minutes after the incident. |
|
|
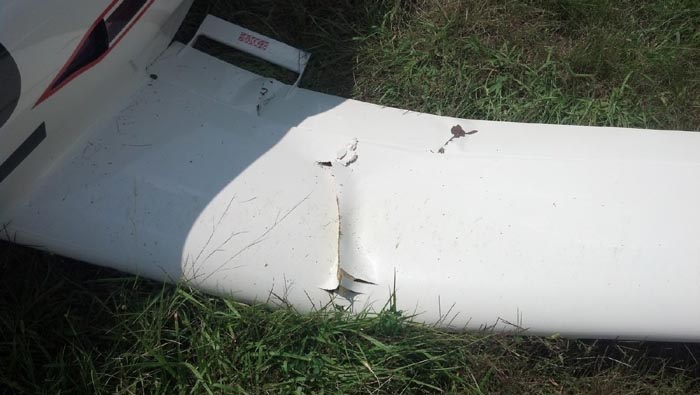
| Duck tape won't fix this one. |
We hit pretty hard and the left canard broke about 20" outboard of the fuselage, which in turn, caused a prop strike.
|
|
| What fun is a runway excursion without a prop strike? This will require an engine tear-down and inspection. I only had 30 hours on that prop since I had it refinished. Rats! |
We were uninjured.
|
|
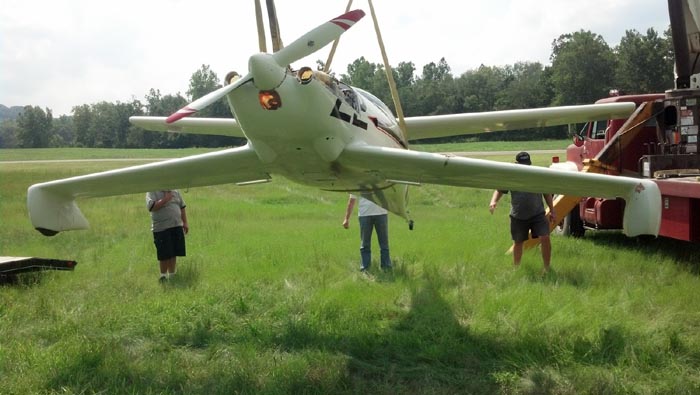
| Fortunately, there just happened to be a crane on site. |
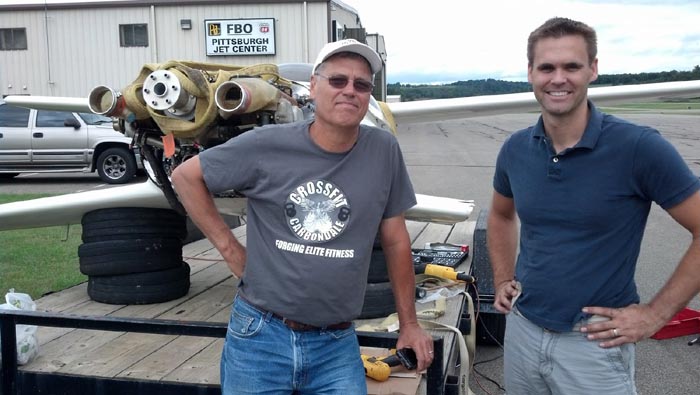
Long story short, single-seat Quickie driver and racer Nathan Peck came to the rescue and hauled a trailer all the way from the St. Louis area to pick us up and drags us home. What a guy!
|
|
| Our rescuer, Nathan Peck. |
|
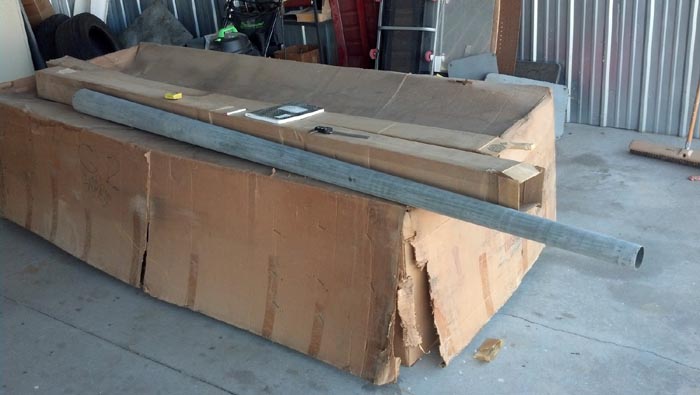
|
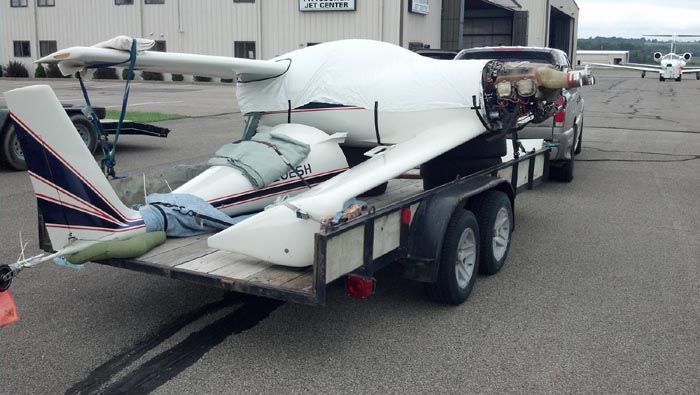
| Ready for the long drive home. |
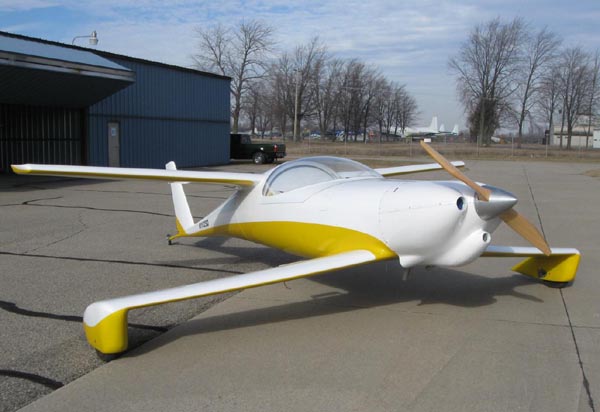
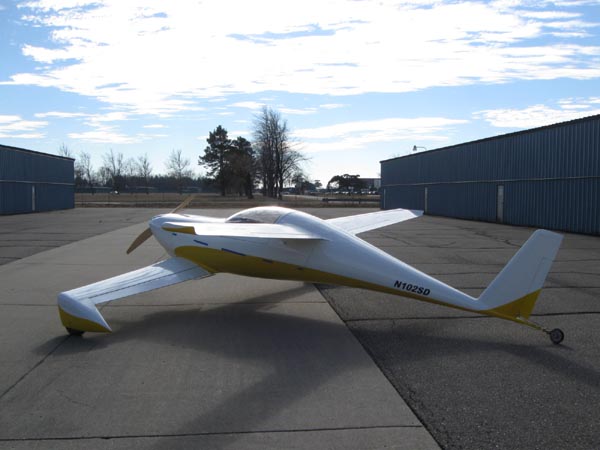
Since this initial report, Sam has already begun rebuilding his plane.
He was able to buy a virgin Q-200 kit locally. He plans to use some parts to rebuild (including the CF Spars) and sell off the rest.
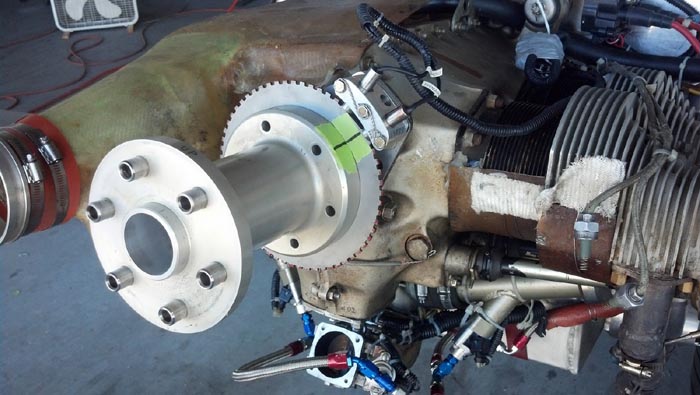
He put a dial indicator on the crankshaft flange and the runout was 0.001". The TCM spec was 0.000" - 0.005". So that was REALLY good news. The engine is likely fine, but he is having Bob Malechek do a teardown inspection just to be sure.
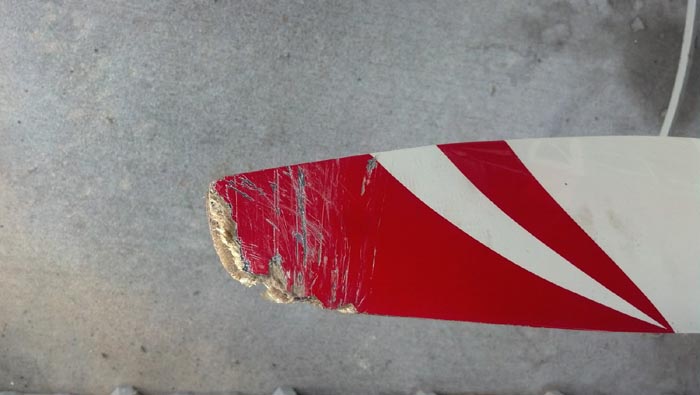
After seeing some photos of Sam’s delaminated prop, Craig Catto (from Catto Props) said it was time for Sam to upgrade to his newer design, and that he would sponsor a new prop! Awesome!
|
|
| What you can’t see in this photo is the 6” delamination. |
For the most recent updates, be sure to check out Sam’s Blog: http://samhoskins.blogspot.com
[Final Notes from our Father who art Jim Masal:
Since i have been around this Q stuff longer than almost all of you guys... and I have a good memory... I can tell you that as original QUICKTALK editor the most heartening times were when a builder/pilot had an accident then had the guts to tell us about it, usually with photos. We learned. A number of pilots did this... look through old Q-Talks to see.
I remember at least 2 guys, now dead, who resisted listening to experience talking. As a pre-web editor we didn't re-hash it ad infinitum. That was editing then... now we have the internet.
This is not Sam H's first rodeo. He has consistently and for long years shared his experiences with his successful and very high time aircraft. He's already doing it again. We will benefit. From all the accounts that I know he is a good pilot, a thoughtful man and a good teacher. He already knows the lesson he learned. Now he has a mess to clean up.
Three cheers for all you guys who IMMEDIATELY stepped up ready to help Sam get his aircraft back home. That has been another satisfying hallmark of the QBA over the years. I'm glad we still have it.
Somebody once wrote: AVIATION IS A HARD TEACHER... IT GIVES THE TEST FIRST AND THE LESSON AFTERWARD.
-Jim Masal]
- Details
-
Category: Safety
-
Published: Tuesday, 26 June 2012 16:09
-
Written by Sanjay Dhall
-
Hits: 17990
by Sanjay Dhall
[Editor's Note: Sanjay Dhall made the following report on the Q-list and I am duplicating it here in the SAFETY section of the website so that everyone can see it. Sanjay has done an amazing job, not only building his plane, but also taking the time to do things right and document them along the way.
Overcoming those "first flight" jitters is something that we all will have to deal with. I appreciate Sanjay's candor and his willingness to NOT fly until he felt everything was ready. His professionalism serves as an example to the rest of us, and I hope each and every person who reads this takes a moment to reflect on this report before attempting to "take to the air" in their own creation. Congratulations on your latest phase of flight Sanjay! Great work!]
Hello Q-folks,
I thought I would update you on my progress with flight testing my Q200. You may recall I made my first flight a year ago on June 17, 2011. By a coincidence, I crossed the 40 hour formal testing period on June 18, 2012, and now have about 43 hours in the Q. In the early days of testing, each flight was a milestone for me and I had reported on my first many flights. As I continued to fly and test the plane, I felt that individual reports may not have added significant value, so I stopped sending those, barring an occasional summarized report in Q-talk. Now that I have arrived at the end of my formal testing period, I figured I would sum up my thoughts on the entire experience.
Phase 0
Before first flight - the overwhelming feeling was one of trepidation, terror and an incessant hurtling towards an inevitability that I had trouble facing - that I had gone to all the trouble and expense to complete this airplane, and now I had to do something - either fly it, find someone to fly it, or something else. Every time I considered the first flight, it would give me the creeps, and instead I would end up at the hangar making minor tweaks. I would continue to talk to many of you for advice and confirmation. I also consulted friends in the local EAA chapter, but their familiarity with this peculiar airplane was limited. At the end, the two design matters left, that concerned me most were CG location and ground angle of attack. So I checked weight and balance again, and checked ground angle. Decided that since the CG was currently at forward end of range, I should try to move it back somewhat to be a little closer to middle of CG range. Crawled into the tail with glass, flox, epoxy, bolts, and 11 lbs of lead plates. Also decided to change the tailwheel configuration to raise the tail to make the ground angle of attack shallower.
Then there were all these questions in my mind, some concerning the airplane, and others concerning me.
Will the engine keep running, will the tail stay on the ground on takeoff roll, will the prop clearance be sufficient if it does not, will the control hinges hold, would bouncing down the runway cause elevators to spring loose, were the control joints free enough.
Will I be able to keep it going straight, will I be able to keep my wits about me, will I be able to.
Phase 1
At first flight - it flies like an airplane. Wow, it took off without surprise, its climbing fast, plenty of power, now can I turn it. Wow it turns just when I think about it, just like a model airplane. Hey, I am well above pattern alt on downwind and climbing to my designated alt, I better pull back on the throttle a little. OK now for that simulated landing at a 1000' AGL. Now can I really land this.Now will it stay on the runway. Phew . relief!
Phase 2
First many flights - does the engine sound right???? Will it keep running? Circled the airport gazillions of times. What's causing the rattle? Learn its flight characteristics. How fast will it go, how slow, how steep a turn. Also learning to land this airplane has been an ongoing experience, still learning.
Phase 3
Leave the airport and fly 20 miles away. Climb to higher altitude when out from under Class B airspace. Tense times, watch temps, listen for engine sounds, rattles, shakes etc. Each sounds ominous. But the engine keeps running.
Phase 4
Increase distance envelope - Go to a different airport and land - increasing distances. Went to Pontiac airport 30 miles away, made a single bounce landing, Next trip went to Howell 35 miles away, landed successfully on a slightly smaller, narrower runway. Next trip flew to Adrian, 40 miles away, landed.
Phase 5
Winter - time to make changes to address numerous squawks including oil temp, rattle (Magbox mods), identify cause of transponder probs, radio probs.
Squawks
- Engine rattle - cause - mainly mag box contact. My mag box opening was a little smaller, more so with fiberfrax, etc.
- Engine rattle when turning left - mag box contact
- Engine carb too lean - not really, it appears to have been related to change of sound while leaning mixture, but still resulting from magbox contact. Opened carb, carb service, nothing wrong in the carb.
- Oil temp on higher side - hovering near 225f (sometimes higher, as high as 240f) at 80f outside temp - re-shaped fuselage belly under canard root near firewall to create higher opening to expose more of oil sump, trimmed and reshaped exit end of cowl to channel more air over oil sump, cut wider front round intake openings from 3.75" dia to 4.75" dia (~40% increase in intake area), reglassed, installed larger oil filter (more cooling surface area), added blast tube from plenum directed at oil filter. Combined effect from all these changes is a 15-25f oil temp drop. Now 90f outside temp yields 220f oil temp with some climb.
- Hot in cabin - added ducting from NACA vent on left side, and install vent to direct air on instrument panel. Added second vent in back of cabin, under wing. Still gets hot at 80f and sunny. This NACA vent has an adjustable damper, but total opening is just 1-1.25 sq. in. So I still need a bigger NACA, Also need to create a bigger opening to allow cabin air to get to vents aft of seat bulkhead.
- Gas smell in cabin. - Used a tissue paper rubbed at tubing joints to see if there are traces of blue stain on tissue. Improved, but not completely gone. I think I still get a faint smell.
- Elevator torque tube attach bolt holes become loose. Bigger bolt and shim stock installed, but the holes in Aluminum seemed to have grown again from use. This single bolt to elevator torque needs some redesign.
- Resonating buzz at high speed - coming from Plenum attachment - solved by tightening plenum to case attachment, and moving small aluminum inter-cylinder baffle piece.
- Shaved and ground away larger clearance of magbox to engine rear. Added reinforcement from inside firewall, and re-glassed exposed ply.
- Oil drain down inside carb upon engine shutdown, and inside cowl from carb - longer engine runs have helped reduce drip, also varies based on prop position at shutdown. Lately the quantity is minimal.
- Communication issues - radio functioned intermittently - tracked it to interference caused by power supply/charger on tablet PC computer used for GPS. Removed the tablet PC and charger, and radio functions well. Installed Android 10" tablet with high brightness for GPS/moving maps, no need for power, due to long battery life. No interference.
- Transponder -ATC reported it intermittent, So removed and sent in for service, but found nothing wrong. Ran tests with transponder test instrument, shows plenty of output power. Must have been the same interference from the tablet PC power supply, now removed. ATC has not said anything about my transponder recently, they have not asked me to ident either, maybe they are just being nice.
- Magnetic compass off by 15degrees, when master switch on, because of placement of Ammeter on left side of instrument panel with high amp wires running across length of instrument panel and under the compass. Just noted on compass correction card. Will move ammeter to right side of instrument panel in future.
- Airspeed gage reads high by about 15mph at cruise speeds. Have made a note of that, with no correction made to instrument and rigging. Could be due to my static air holes located just behind seatback bulkhead under wings. May move it aft in future.
- Fuel tank burp when main tank full. The unvented fuel cap sometimes traps air pockets, which expand with temp. Caused on 2 occasions to spit fuel past the fuel cap. I presume, in that 'spit' moment, the cap is forced to vent due to air pressure. Left some permanent blue fuel stains on the paint at the fuel filler opening. Now if tank is full, I leave the fuel cap slightly open to allow venting, with rags near the filleropening, till flight time. The real reason for this problem is that the overflow tube when built to plans, is a little below the crown of the main tank. Since the overflow tube is also a vent for the main tank, it becomes obstructed as it has fuel in it when main tank is full. Will need to change this overflow tube location and move it higher in the future.
Back to the report:
Phase 6
Gingerly re-familiarize myself with airplane after minimal flying through winter.
Phase 7
Increase distances and flight duration. Began flying higher and further, going out 60-70miles, circling destination, returning without landing there, to achieve longer engine runtimes and flight durations, altitudes up to 6500-7000', flight times of 1.2-1.4 hours. But constantly watching engine params - Oil temp, cht, egt.
From time to time on these flights, I have had moments that ranged between relaxation and euphoria, where everything is going fine, not worrying about engine, sounds or gages and just enjoying the scenery all around. Occasionally, have gotten into a playful state, so as to yank the stick around, make steep turns, add full power and see how fast it will go. Fun.
Phase 8
Remembering that this is a testing exercise, did climb and descent tests at altitudes, as also testing for best glide speeds and best descent rates. In the last 5 hours, added weights in right seat in 50 lbs increments, using sand and gravel bags. In the most recent flights, had 190 lbs in right side, full fuel, 90f outside temp, noted differences in performance during takeoff, climbout, and stepped climbs (to keep oil temps in check) to 8500', and noting that there was still a 500-600fpm climb rate available at that altitude, ~1200lbs weight and hot conditions. With these conditions the descent and landings were a little more surprising, in that approaches were somewhat short, requiring adding power to make the runway, with somewhat heavier landings, and longer rollouts. Fuel consumption is as would be expected from an O-200 at cruise.
Although, I am more familiar with the Q now than before, I have plenty of reminders on just about every flight, during takeoff, landings and at other moments, that there is a lot more to be learned about flying this airplane, in all sorts of conditions. For example, other than at home base which has 7500'x150' runways, I have made landings only on 5000'x100' runways. As a next step in my learning, in the near future I want to make landings at airport with 3500'x75' runways. Also, I have tried to restrict my flying to weather conditions that are decent, with winds no higher than about 15-20knots and directions are favorable. Will have to graduate past that also. Oh, and at some point, try to do some cross-country flying as well, actually go places!
As I progressed through these early hours, I have grown to really love flying the Q. Every takeoff is exhilarating, every bank and turn is a rush, and every landing exciting. But just when I think I am getting the hang of it, there is a sloppy takeoff or a landing close to the edge waiting to remind me to pay attention, and not let my guard down.
This has been a most rewarding experience. I hope to keep at it. I hope you will too.
Thanks
Sanjay Dhall
- Details
-
Category: Safety
-
Published: Tuesday, 28 February 2012 00:55
-
Written by Charlie Johnson
-
Hits: 24854
[EDITOR'S NOTE: Over the last few years I have heard a lot of questions raised about the necessity of “sparrow strainers” on our tandem wing designs. I’ve even heard of several people attempting first flights without them for mere aesthetic reasons, with very bad results!
Recently on the “Dragonfly List” the question was raised again, and I am reprinting Charlie Johnson’s very thorough reply here in the safety section so that future flyers can learn from it.
The upshot of all this is that if your plans call for “sparrow strainers”, you should not attempt to fly without them.]
Question: I have not noticed sparrow strainers on other canards/tandem wings such as Vari-eze, Long-Ez, or Quickies.
If there are no sparrow strainers and very light springs on the trim system. How much back pressure will be required on the stick to keep a climb out and level cruise?
Terry Adams
N41521
Answer: A LOT.
Estimate 1000 lb/100 ft squared = 10 lb/ ft squared. Elevator is .5 ft X 9 ft = 4.5 ft squared times 2 = 9 ft squared so they carry 90 lbs reacted to the elevator as a torque from the elevator centroid of 3 inches.
So 3" = .25 ft and .25 ft X 90 lbs = 22.5 lbs of torque at the elevator. You can work the moments and forces back to the stick. The numbers are just rounded off guesses but the centroid of an area like a flap is mathematically where all of the forces can be summed. Then the distance from that point to the hinge is the moment arm multiplied by the total force on the surface.
Vari-EZ plan forms are delta wings with a 10% loaded canard. So stabilizer sparrow strainers are not required. But Quickies do, in fact, have sparrow strainers.
Q's and Dragonflies are not delta wings and carry over 2/3 of the lifting force on the canard or stabilizer. In these planes the attitude is controlled by the combined lift of the wing 1/3 and canard 2/3.
Increasing lift on the canard is not done by rotating around the center of pressure of the canard to increase the angle of attack. Increasing lift is done by increasing camber of the canard by using a simple flap, we call an elevator because it is on our stabilizer. Aerodynamically it is a flap, and flaps are loaded. Hence their tendency to rotate up and the nose goes down because you decrease camber and lose lift.
The sparrow strainer is a Clark airfoil that flies upside down at an angle of attack to generate enough down lift to match the rotating moment. Both forces are aerodynamic, and change with speed, but ideally cancel each other out so you have neutral stick force at slow and fast speeds.
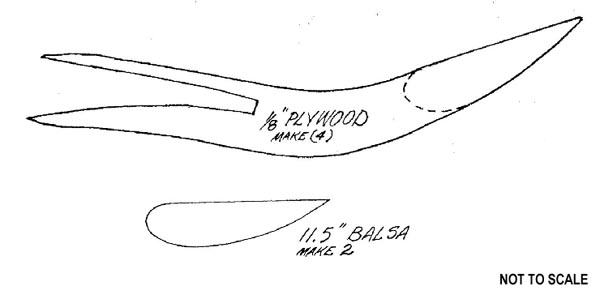
Following the plans sparrow strainers is a good cheap start. The plans specify the angle between the bottom of the elevator and the top side (airfoil bottom) of the sparrow strainer. The more mass behind the hinge line the more chance for flutter so make them light.
On the Dragonfly, use the modified welded elevator torque tubes at a minimum, and then mass balance for the best elevator setup. I hope you can see the design already has flaps but used in a different way than you think about in a conventional design. The designer figured out the way to control the unwanted forces using sparrow strainers. Other people have attempted to improve it, but the result is more complication and the jury is out on the effectiveness.
Balsa wood carves easily and you can make an emergency kit by cutting out the pieces and packing them with a 5 min epoxy syringe. If you lose one or a kid steps on yours you can fix it in 30 minutes and let it sit for a couple of hours and you are ready to go.
You can adjust the angle by sanding the end support where it glues on to the bottom of the elevator to dial in the lift required to balance your elevators. This should be part of the 40 hr flying time in phase one. After you get the geometry you can glass over the sparrow strainers with 2 oz cloth to make them more durable, and then paint them. Making elaborate adjustable ones is unnecessary since they will eventually end up in one fixed position anyway.
The design works fine. Just follow the plans and get the incidence angles dead on. The addition of the aileron reflex control now allows you to adjust the lift that the rear lifting surface produces. The reflexor therefore, changes the ailerons into flapperons. Now you can adjust the attitude of the plane in flight trimming in the fuselage to a low angle of attack. The reflexor also compensates for the different loadings because the pilot/passenger moment stations are behind the aft cg station which is somewhere over the gas tank.
I lost a sparrow strainer in flight a couple of times and it was flyable. With two gone I would not want to fly it very far. Constantly fighting control forces does not lead to precision landings. The plane will want to dive with any relaxation on the stick. Before you fly your plane this way, hold up a 10 lb weight with your fingers for ten minutes to approximate going around the patch.
My 2¢. I hope this helps.
Charlie Johnson
Ogden, UT
- Details
-
Category: Safety
-
Published: Monday, 25 June 2012 16:20
-
Written by JIM MASAL
-
Hits: 18217
by Jim Masal
[Editor’s Note: Our beloved founder woke from his winter slumber and immediately began attending fly-ins, and even reading a few newsletter back issues on this newfangled computer thingy! What follows is Jim’s response to my request for articles from the last Q-talk.]

Hey... finally I got to read a newsletter!
I wazzat Sun n Fun and I can confirm Jerry's report that the PR people musta been workin with crosseyes if they saw record attendance. I left early since the show seemed less "sparkly" than usual.
There were a coupla tandem wingers to look at but a thin homebuilt area, and I enjoyed the team of 3 czech jets flying with 2 migs all in urban camo (black,white and grey) which put on a nice show... and of course the Air Force team which rocked the socks off. But I may be jaded after 38 years at Oshkosh.
The UL/Sport Av pen was a little light of Sport Av so the vendors were tempted to come out and attack you just to have something to do.
Military aviation past and present had a pretty full lineup to enjoy and the spectators seemed to do so very well. camera snapping was abundant.
True enough the aisles in the large vendor hangars were easy to negotiate without bumping elbows and butts and it was pleasant to get questions answered and demos given. Everybody was in a good mood. I gotta lotta free pens, a coupla ballcaps and some hard candy. And the weather was excellent!

GRRRRrrrrrrrrrrrrrrrrrrrrrrrrrrrr. I am glad I am out of the newsletter business!!!
Now, I know the B-24 needed such a large tailfin that the engineers had to split it in two and the Corsair needed to have kinked wings to clear the prop of the ground, etc. etc. etc., but my nerve endings just go apeshit when I read or hear about extreme mods to our Q's.
Spam cans are subjected to tireless discussion and analysis by highly skilled and educated individuals before a mod is put into play and success means money in the bank. Not so with the amateur aircraft builder whose success is a nice flight that proves his earlier redesign fantasies were successfully executed. But there is a distinct and likely possibility he will be executed by them.
In our most recent death by Q craft we have a builder who, after a hundred + successful Q's before him, decided that he didn't need sparrow strainers. He was strongly disabused of that idea at the Marion Q fly-in and he accepted the wisdom. The sparrow strainers were not likely implicated in his short landed crash into runway approach lights, but one can't help but wonder what other creative change he might have made to the plane which did him in.
And then I read of a Colorado builder who has incorporated a more complicated split rudder into his tail and a larger fuel tank which he cheerfully admits will last longer than his bladder. Is it asinine of me to ask WHY?
But I am ambivalent.
We live in America, land of the free and despite government intrusion into our safety there are still areas in which we are free to flaunt risk. We don't have shoulder harnesses on school busses... yet.
We need experimenters and risk takers. The original Q2 had no belly board. The original Q2 sported a Garry LeGare mod called the T-tail which was short lived and replaced by the QAC Reflexor. And then came the LS-1 canard, the carbon fiber spar and the 0-200 engine, the Jim/Bob 6-pack and the Gall Alignment (but never came the large rudder!). These mods came to the general audience tested and flown first. Beware at your peril of those which don't !!
As a P.S. let me add that in the construction and operation of a Q it is not only the building process in which care must be taken, but the brain of the builder/pilot must be carefully trained and controlled as well. Recently a wary pilot/builder named Sanjay reported on the entire year which he used to spend the required 20 hours of test time with his Q-200. He carefully and deliberately crept up on learning his Q's characteristics and now he is experiencing great and profound joy. His buddy who was building a Q close to Sajay's area and who finished a little earlier than he did... is dead this year.