- Details
-
Category: Q-Talk Articles
-
Published: Wednesday, 23 December 2009 16:24
-
Written by Dave Richardson
-
Hits: 7081
When the to-do list dwindles down to the final "Short List", it is time to start the FAA paperwork so you can fly your Q. I am in the throws of this process right now on my plane and will share what I learn as tilings unfold. Just like recipes for making chili, though, there are many ways to do the same thing. I am going to describe my approach based on the research I did.
The FAA offers some publications on this process, but they really only cover the simple "One Builder" scenario. Since there are Q projects out there that are 20+ years old, very few Q's are being finished by the original buyer. I am going to expand on the FAA examples found in their books where appropriate. There are two distinct paperwork phases you must go through before you fly. The first phase relates to ownership while the second relates to airworthiness, culminating with the inspection of the plane. The remainder of this article will discuss the ownership registration process.
The FAA will not let you display an N number on your plane until you have proven you are the owner of the plane. By die way, you can reserve an N number ahead of time for the nominal fee of $10 per year. You can contact the FAA at (405)954-3116 to see if your favorite N number is available or you can visit http://www.landings.com or other similar sites to do your own search. When you submit your number choice to the FAA, be sure to include five possible alternatives in case your top pick is gone.
To register your plane you will need a copy of the following forms:
? Aircraft Bill of Sale
? Aircraft Registration Application
? Affidavit of Ownership for Amateur-Built Aircraft
? S5 money order for the application fee.
We are going to examine each one of these forms and some of their subtleties as we go. The first thing you have to realize is that the Bill of Sale and Aircraft Registration Application forms were not designed with amateur built aircraft in mind so there needs to be some adjustments to make them work. I recommend using a typewriter for all submissions.
Let's start with the steps to complete the BILL OF SALE, form 8050-2. For a plane that has never been registered, this represents the transaction between QAC and you or the previous builder and you.
l.You X out the word AIRCRAFT at the top of the form where it says "AIRCRAFT BILL OF SALE'" and type in the word KIT in the space to the left.
2. You can enter what you paid for the kit next to the dollar sign in the line that begins with "For and in consideration of $". If you do not want to share those details with the FAA, you can type in 1+0VC meaning "one dollar and other valuable considerations." I think that is lawyer-speak for "Mind your own business!"
3. Leave the N number line blank even if you reserved one for the plane. Again this is a kit bill of sale and kits do not have N numbers assigned to them.
4. For Aircraft Manufacturer & Model enter Quickie Aircraft and the type of Quickie you bought i.e. Quickie or Q2 or Q200. etc. '
5. For aircraft serial number. X out the word Aircraft and type Kit below it with the QAC serial number of the kit. Again, this is a kit bill of sale so you need the serial number assigned from the manufacturer of the kit. If you have the documentation, you may also want to include on that line "Less than 49% complete"
6. Enter the date you purchased the kit in the area that begins with "Does this day of'. You may wonder if you should backdate this entry. I did because it is important to show the date that the actual transaction occurred.
7. In the section entitled. PURCHASER, type in your last name, comma, first name and middle initial. Enter your complete address below your name. Ignore the line saying dealer certificate number.
8. There are three columns in the SELLER section of the form. Type the Seller's name in the first column. In the second column, have the previous owner sign their name in ink on BOTH copies of the form, including the carbon copy, because the FAA wants to see all signatures in ink. Type the word Owner in the title column or you can leave that blank. You do NOT need to have this Kit Bill of Sale notarized.
This Kit Bill of Sale is the last document in the paper trail between Quickie Aircraft Corp (QAC) and you. You need to provide documentation showing any sales of the kit after it left QAC and when you bought the kit. My understanding is that the FAA wants a form 8050-2 Kit Bill of Sale for the transaction that represents your purchase of the kit. They should accept copies of documents showing previous transactions. For situations such as "I'm the only builder and I bought the kit from QAC. Since QAC is out of business now, how do I get a signed form?" or "The previous builder died. What can I do?" or "I have die last transaction documented with a form 8050-2 but one of die other previous owners cannot be located. What can I do?" I suggest you contact the FAA for your options. There are those who say you can just claim your plane is "Plans Built" instead of "Kit Built" to get around having to send in a Bill of Sale at all. I will not. however, advise any of you to lie to the FAA.
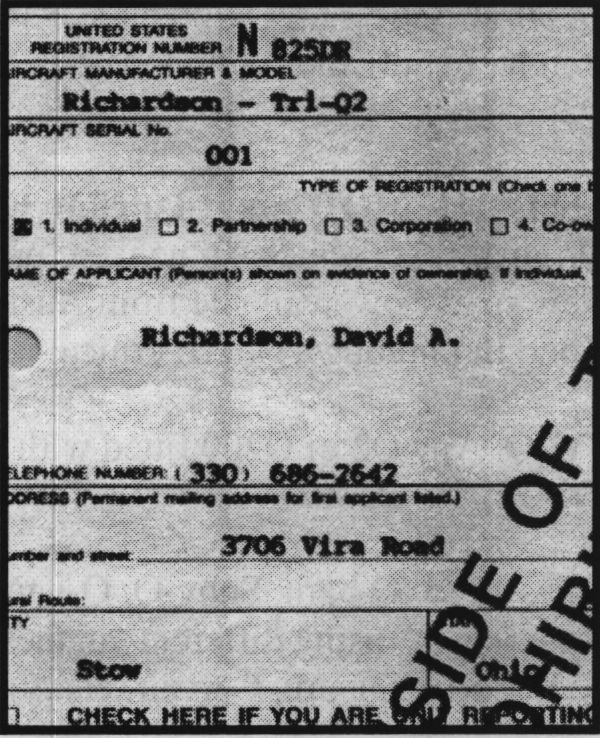
The next form is the 8050-1 AIRCRAFT REGISTRATION APPLICATION. The perspective of this form is very different from the Bill of Sale. In the Bill of Sale, you are saying "Here are the details of the kit when I bought it." In the registration form, you are showing information about the plane as you are preparing to fly.
1. In the "United Sates Registration Number N" section of the form, type in your reserved "N" number, if you have one. or leave it blank and let the FAA randomly assign a number to your plane.
2. On the "Aircraft manufacturer & model" line, type your last name, because you are considered the manufacturer of this plane, then type a hyphen and the type of Q you built. I entered Richardson - Tri-Q2.
3. The "Aircraft serial no." box is unique because YOU assign a serial number to your plane. This serial number has nothing to do with the QAC kit serial number, however, you can use die same serial number, if you would like. Many people use 001 for the serial number to indicate that this is die first Q they built. It really does not matter which serial number you assign to your plane, you just have to be consistent when completing subsequent forms. If you type 001 here and type 1 or 01 on a later document, you will be rejected because the serial numbers must match exactly.
4. Be sure to X die type of registration you are making, be it individual or other options.
5. Enter your name as the applicant as you did in the Bill of Sale; last name, comma, first name and middle initial. Consistency is important here. too. Be sure to enter your information the same way each time. Enter your phone number and address information in the boxes provided.
6. Within the first signature box at the bottom of the form,
sign your name and then beneadi it, type your name same as written.
7. Type the word Owner in the title box and enter the date signed in the last column.
The instructions for form 8050-1 indicate you can operate the aircraft for 90 days with the last copy of die form, also referred to as the pink copy. Remember, though, this form is designed for non-amateur built aircraft. Check with your FSDO or MIDO to see if it holds true for your area. You may be required to wait until you receive the FAA's acknowledgement of your registration, form 8050-3, before you can proceed to die next paperwork phase.
Form 8050-88, AFFIDAVIT OF OWNERSHIP FOR AN AMATEUR BUILT AIRPLANE, is veiv straightforward to complete. You must have your signature notarized, though. Do not sign the document until you are before a notary public.
The last item of business is die $5 MONEY ORDER for your application fee. Using a money order should speed the process because they will not have to wait for your personal check to clear.
You can learn more about this registration process by reading the FAA document AC no. 20-27D for some of die specifics that may have been omitted here.
There is one more important aspect to these forms. Should you wait until you have fueled your plane, ready for your test flights before you submit them? Should you send in your registration in even though you have not attached the wing or canard yet? I believe the answer to botii is NO. Remember die FAA mentioned 90 days for the pink copy of the 8050-1? That sets up the expectation that it may take up to 90 days to receive the 8050-3 acknowledgement back from the FAA. It seems that 30-60 days is typical, if there are no problems with the paperwork. Plan that into your schedule.
You can order a printed copy of Q-talk #97 by using the Q-talk Back Issue Order Page.


