
| 5. |
When the complete aileron assembly fits well, and rotates freely, mix up some
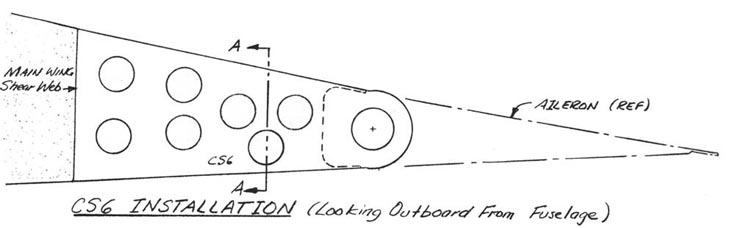
5-MIN with flox and temporaily mount CSIO, CS6, and CS7 in place against the main wing shear web, again checkiNg for alignment, clearances, and binding.
|
| 6. |
If you haven't already done so, repeat for
the other aileron.
|
| 7. |
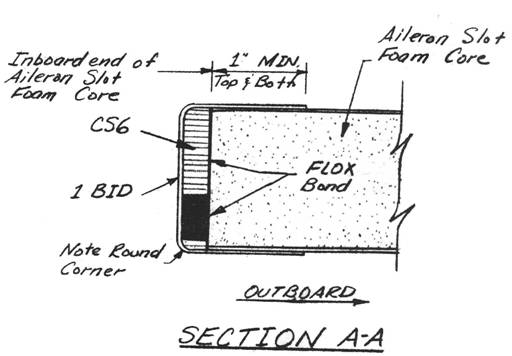
Remove
all of the pieces except CS10, CS6, and CS7. Carefully lay up the BID
cloth that permanently holds CS10, CS6, and CS7
in place. These parts must be solidly
mounted so that they cannot be accidentally broken off while in service.
|
| 8. |
Once
the laminations in step 7 have cured, you are ready to drill in the aileron
assemblies. Find your aileron rigging template, reassemble everything
and set the ailerons at 0 degrees. Also, the "ear" on
each A2CSA4 should point forward and be parrallel to a WL. Verify that
the aileron is pushed outboard against CS10. Verify that CSll overl aps
1.0" into A2CSA4 and 1.8" into the aileron reducer. Now drill in very
carefully the two bolts on each side that fasten Q2CSA4, CSll, and CS9/aileron
reducer together. BE CAREFUL! Don't let the holes elongate; use a small
drill and work up in size.
|
 |
|
|
