Q1 Plans Chapter 10 Page 10-5
- Details
- Category: Quickie Plans
- Published: Saturday, 13 September 2008 01:00
- Written by Dan Yager
- Hits: 3961
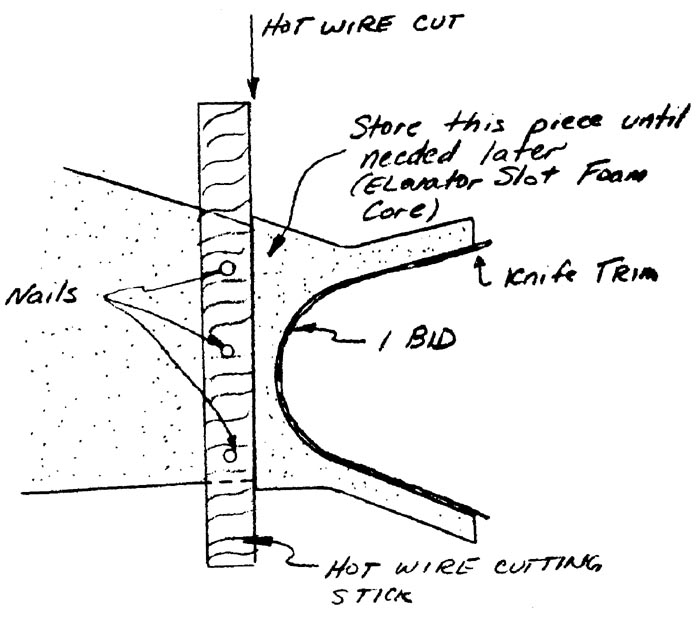
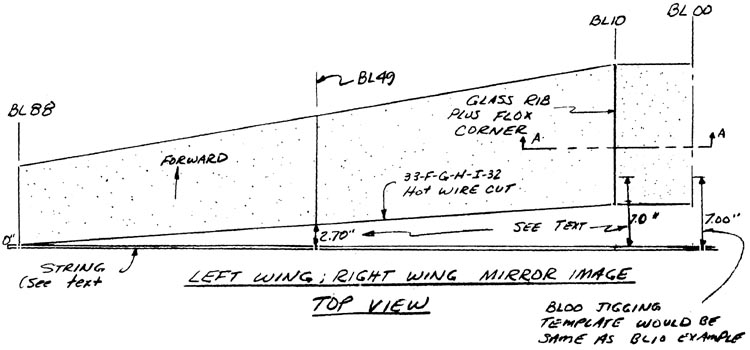
Construction begins by glassing the elevator slots with one BID at 45 deg. to the spanwise direction, just like the aileron slots. When the layup has cured, cut the BL10, BL49,. and BL88 templates at the 33-F-G-H-I-32 line. Use these templates to hot wire the foam cores into two pieces each in preparation for glasiing the canard.

The canard must first be jigged upside down on the table. Note that since the canard has anhedral rather than dihedral, the canard tips will be higher than the root, which is opposite of the main wing. Full size patterns of the female jigging templates are included, and these should be made at this time.
Also included is a top view of the canard, showing the sweepback on the trailing edge. Reread the main wing construction section to review the use of a string to help jig the cores. The dimensions given on the canard top view are duplicates of those on the female jigging templates for the canard and represent the distance from the string to the aft end of the jigging template.
The elevator slot foam cores should be stored since they will not be jigged at this time.
As you are locating the cores into position, check to verify that the level line on each core is level. This is important so be careful.
At BL10, left and right, you may have to do some sanding to make the cores fit together at the proper angle. CAUTION the cores must fit within 1/16” or exotherm damage can occur.

Also, stand back and sight spanwise along the canard to verify that the canard is not bowed or kinked. A straight edge laid spanwise is also useful for this.
Don’t be concerned if the templates need to be moved inboard or outboard slightly to remove any bows or kinks in the canard. When everything is satisfactory, mix up some bondo and bondo the templates to the table top in the proper locations. After that is accomplished, the foam cores should be just resting on the templates.
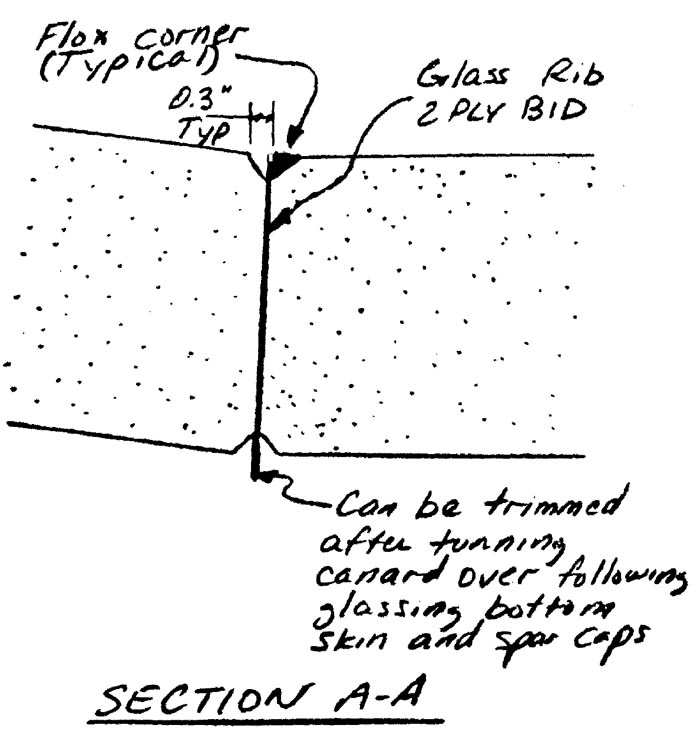
The next step is to join the foam cores together. Glass ribs are layed up at the BL10 joint on each side. The BL49 joint is accomplished with micro slurry. Be sure to use slow epoxy. Refer to the education section for core joining information.
After the combination has cured, cut in the Flox Corners at the BL10 joints. Before doing the Flox corners, however, recheck the level lines at the tips and 5 minute the cores to the templates.


