Q1 Plans Chapter 7 Page 7-11
- Details
- Category: Quickie Plans
- Published: Saturday, 11 October 2008 01:00
- Written by Dan Yager
- Hits: 2992
Take a 30 minute break to allow all the tapes to begin getting tacky.
When you return, carefully begin trial fitting all of the fuselage bulkheads except for the Fuel Tank. Sand and Trim these where necessary. Be careful not to damage the tapes that were recently put in.
Carefully insert the fuselage bulkheads with dry micro wherever the bulkheads meet the fuselage. Use the following order:
- FU89
- FU11O
- Seatback Bulkhead
- FU153.7 - Leave out for now.

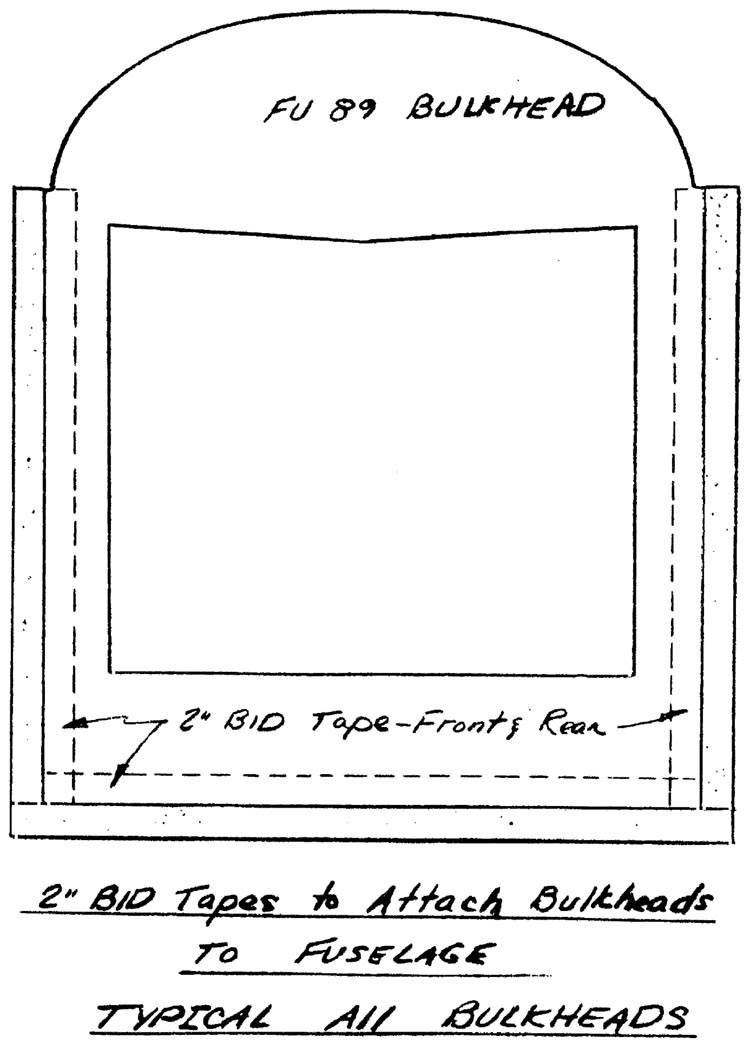
Use the bulkhead position lines on each fuselage side to position each bulkhead. Ignore the lines on the fuselage bottom. After inserting each bulkhead, run a 2” BID tape along both front and rear face before proceeding to the next bulkhead. Make sure that you get good micro squeeze out and form a micro radius wherever the tapes go.
The fuselage aft top can now be put on. Use 5-minute or nails to hold it in place, a micro radius along the inside edge, and a 2” BID tape along the joints on the inside. Then insert and tape the FU1S3.7 bulkhead in place.
The final step, checking the Fuselage alignment, is important. Since the tapes haven’t kicked yet, the fuselage can still be tweaked to obtain the proper alignment. Since the two fuselage sides were made and fitted identically, check the basic level of the fuselage by laying a level across the fuselage sides at several locations. The squareness of the Firewall had been previously checked but it wouldn’t hurt to repeat that check also.
When you are satisfied that the fuselage is jigged and level, walk away from it for at least one day to let it cure.
CARVING THE OUTSIDE FUSELAGE
This section is one where you get to demonstrate your artistic capability. If it takes you longer than four hours to accomplish the sculpturing, then you are being too cautious and not having enough fun!
The purpose for carving the outside fuselage is to reduce weight, as well as to provide the Quickie with a sleek, rounded look. The sketches and pictures show you how to accomplish this. Basically, the corners of the fuselage are rounded by carving away the green foam. Tools that are useful in this section include a butcher knife, sandpaper, foam scraps, and a surform file. Always wear a mask, as the green foam shavings should not be inhaled.
In the corners, you can remove foam until you reach that 2” BID tape layup that you did on the inside. Do not sand any further at that point unless you want to destroy the fuselage strength!
In the rear fuselage, at the tailspring support, the green foam is removed completely so that the aft fuselage will flow smoothly into the tailsring. Therefore the red foam that is the tailspring support is rounded some also.
Remember to make the contouring as smooth and flowing as you can.
CONTINUED ON NEXT PAGE


