Q1 Plans Chapter 8 Page 8-5
- Details
- Category: Quickie Plans
- Published: Friday, 03 October 2008 01:00
- Written by Dan Yager
- Hits: 2730

INSTALLING THE TAILWHEEL
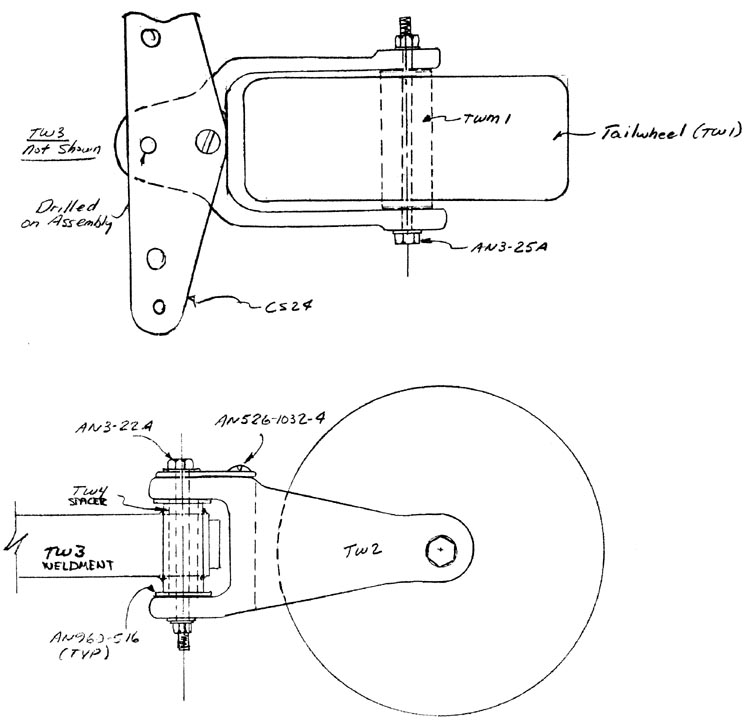
Begin by inserting TWM1 through the tailwheel(TWI). Next, trial fit the assembly in position. There should be a freeplay of about .02” between TWM1 and TW2. Once you have done this, you can install the tail- wheel with the AN3 bolt, tightening it until it snubs up against TWM1, which should not pivot when the wheel rotates.
Then, install CS24 with the aft screw and drill in the front hole for the AN3 bolt, Now, you can assemble TW3, TW4, and TW2 as shown. TW3 will have to be sanded to permit a slight amount of freeplay between it and TW2. After assembly, TW2 and TW4 rotate together inside of TW3.
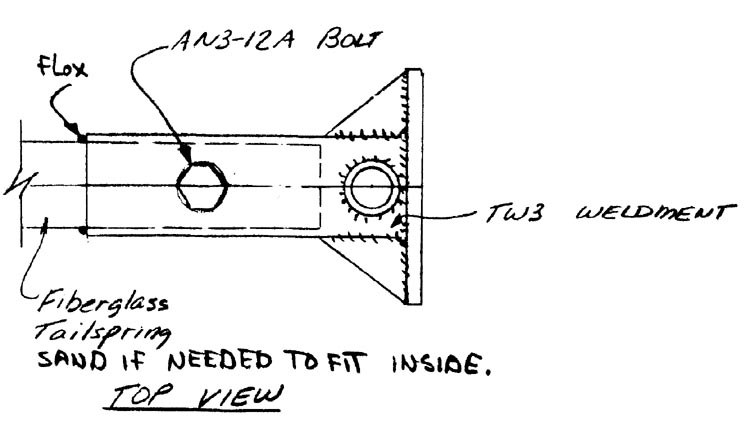
Finally, install TW3 onto the tatispring. Be sure to level the aircraft laterally first and to make sure that the tailwheel will be perpendicular to the ground. TW3 is installed with flox and the AN3-12A bolt.


